
Pattern Hacks
Carry All Flexi Clutch – Adding a Shoulder Strap: Option #1

Since the release of the Carry All Flexi Clutch a few months ago, many people have asked how to add a shoulder strap to transform it from a clutch to a small purse.
With there being several ways to attach a shoulder strap, I decided to team up with the lovely Aimee from The Little Bird Designs to bring you a short series of blog posts detailing exactly this! So, without further ado, please welcome Aimee to the blog!
Not familiar with the Carry All Flexi Clutch? Not a problem! You can find the pattern here.
When I first read that someone wanted to add a shoulder strap to a Carry All Flexi Clutch, I thought “Why? It’s so perfect like it is!” and then I did it. My goodness, I AM. IN. LOVE! Adding a simple strap takes this clutch to a whole new level! I might have to do this to all of them!
Today I am going to share a quick and simple way to add a shoulder strap to your next Carry All Flexi Clutch! To get started, you need your clutch sewn up until you have an assembled outer and lining. Set those aside and we shall work on our strap!

To make a strap you will need:
- 1 strip of fabric, 4″ x 23″ (10cm x 58.5cm) (or longer if you wish!)
- 1 strip of lightweight interfacing, 2″ x 23″ (5cm x 58.5cm)
To make two strap connectors you will need:
- 2 pieces of fabric, 4″ x 4″ (10cm x 10cm)
- 2 pieces of lightweight interfacing, 2″ x 4″ (5cm x 10cm)
- 2 rectangular rings, 1″ (2.5cm) size (OR, try D-rings or O-rings for a different look!)
Let’s start with the connectors!
Fold each piece of fabric in half, wrong sides together, and press.
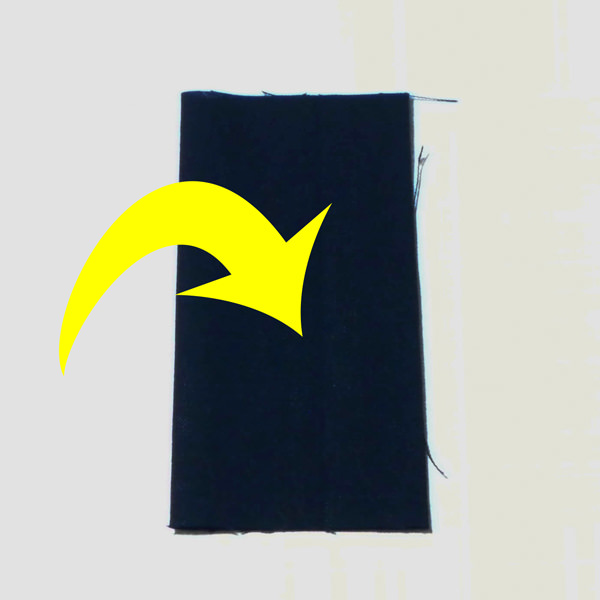
Open out, fold the edges in towards the centre (wrong sides together) and press well.

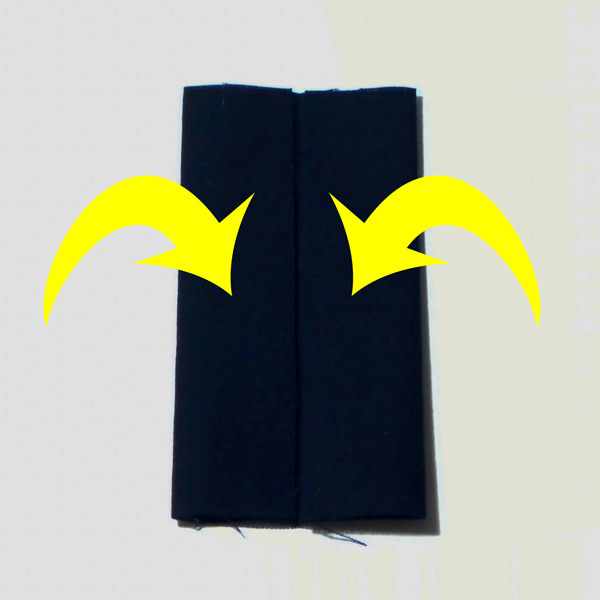
Open your piece back up and fuse a corresponding strip of interfacing down the channel, on the wrong side of the fabric.

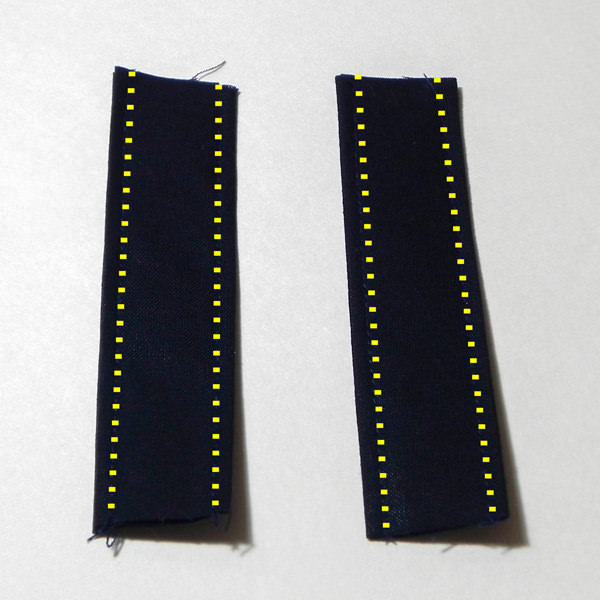
Refold and press well. Top stitch down each long side to finish using a 1/8″ (0.3cm) seam allowance.
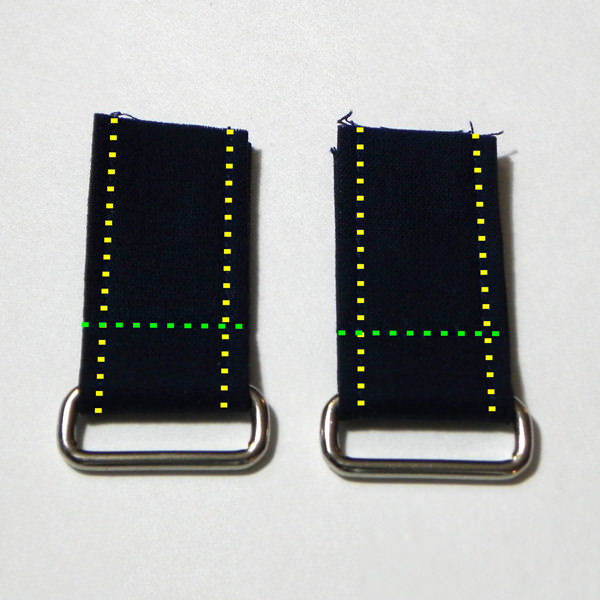
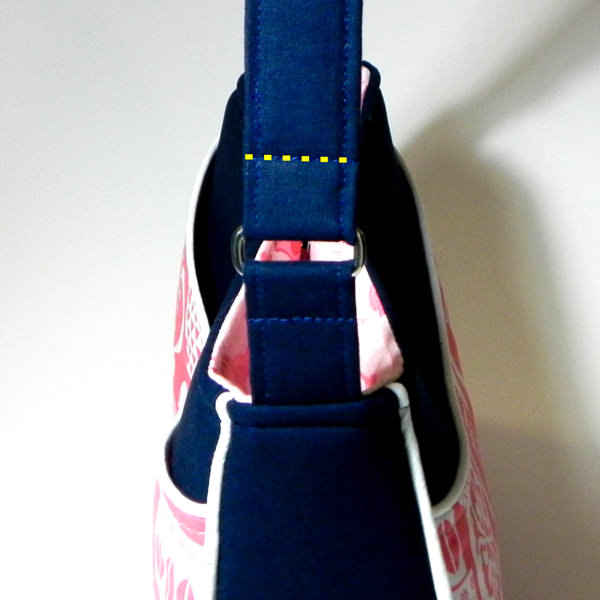
Slide a rectangle ring onto each connector strip and fold the tabs in half so the raw ends meet. Top stitch about 1/2″ (1.3cm) away from the bottom of the ring. This gives you a nice finished look and helps to stop them from turning sideways!
Take your outer clutch and clip and baste a connector tab onto the top raw edge at each end of the gusset. Basting them is very important as it prevents them from moving sideways when you sew the whole thing together.


Go ahead and assemble your clutch as per the pattern!
Strap Time!
Start by folding in 1/4″ (0.6cm) in at each short end of the strap piece (to the wrong side).

Repeat the first part of creating the connector tabs (folding the fabric and fusing the interfacing) to give you with a 1″ (2.5cm) wide strap. Top stitch around your strap, stitching across the bottom, short edges too! Mark 1″ (2.5cm) IN from each end of your strap (shown with pins in my example).
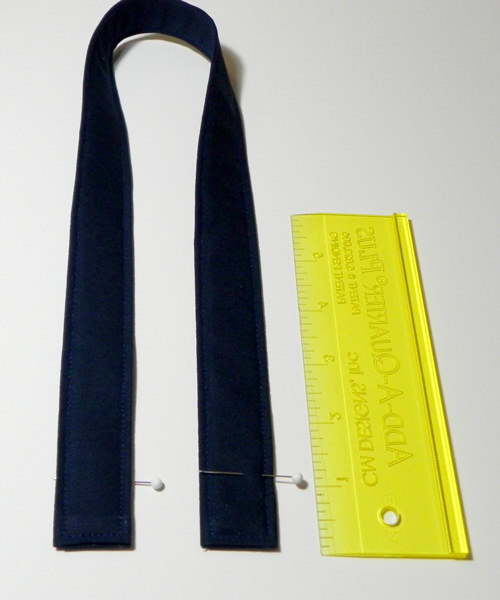
Slide your strap into your rings. That 1″ mark will be where each rectangular ring needs to sit. Top stitch in place at each end of the strap, making sure to backstitch or stitch over the strap a couple of times for added stability!
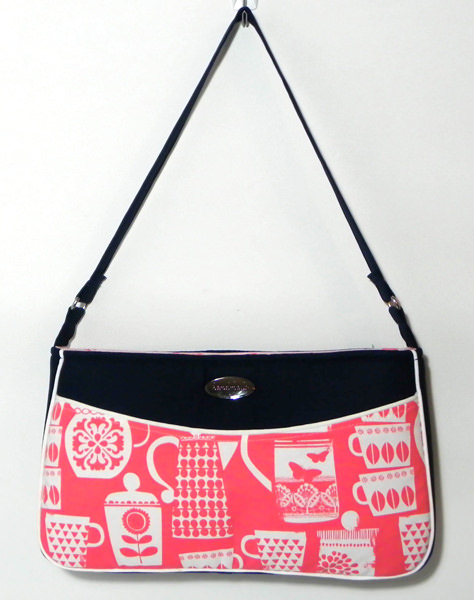
And you are done! Step back and enjoy your new Carry All Flexi Bag!
I just love how much it changes the look! If you made the strap longer or a cross body, it would change the look even more!

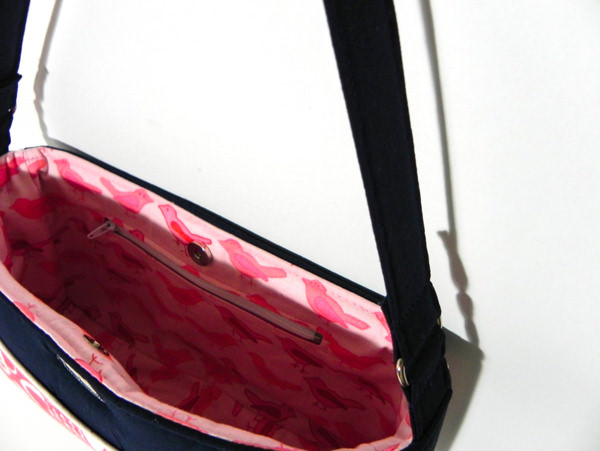
Plus with all the pocket options and closure options, the possibilities are endless!
Thank you for a wonderful tutorial Aimee! Your clutch looks gorgeous and that extra added bling takes it to a whole new level!
You can see more of Aimee’s amazing bags via any of her social media below –
- Website – www.thelittlebirddesigns.com
- Facebook page – www.facebook.com/Thelittlebirddesigns
- Instagram – www.instagram.com/lilbirdsdesign
Click here to find out more about the Carry All Flexi Clutch pattern and until next time, happy sewing! Lisa x
Pingback: Carry All Flexi Clutch - Adding a Shoulder Strap: Option #2 - two pretty poppets
Pingback: Carry All Flexi Clutch - Adding a Shoulder Strap: Option #2 - Andrie Designs formerly Two Pretty Poppets