
Sew Alongs
Hang About Toiletry Bag Sew Along – DAY FOUR
 Hello hello and welcome back to the Hang About Toiletry Bag Sew Along! You can find the pattern for this sew along here and if this is your first time here don’t worry, you still have plenty of time to join in – we’d love to have you join in the fun!
DAY FOUR
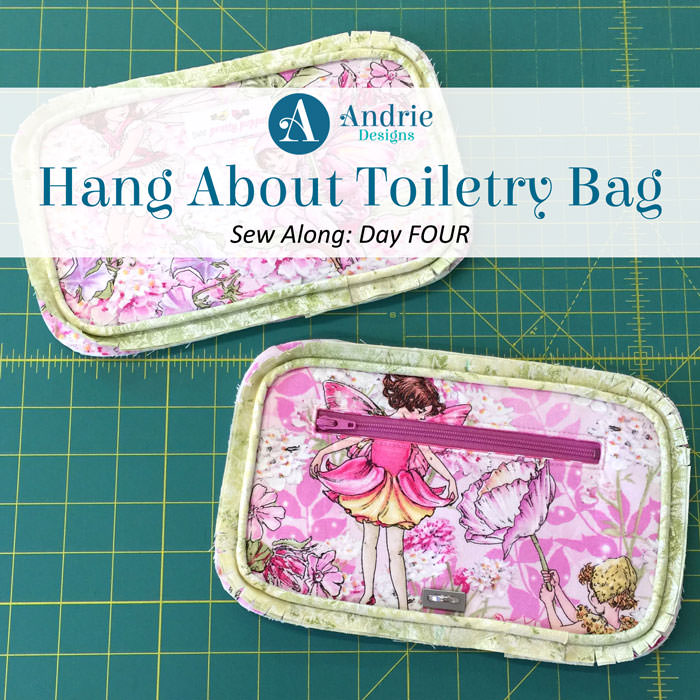
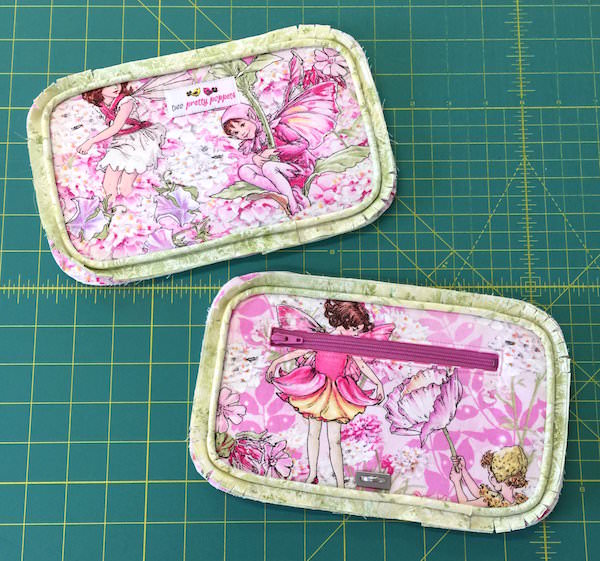
Today we are creating our front and back outer panels by working through steps 29 – 40 of the pattern (steps 15-20 of the Andrie Designs-branded version).
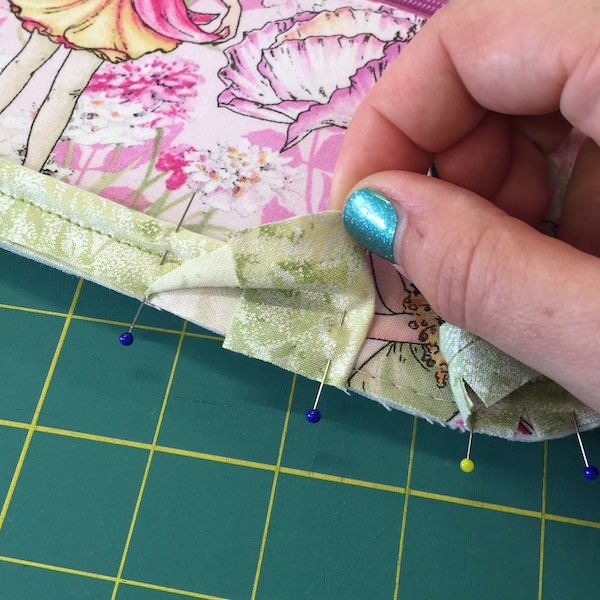
Once you’ve pinned your piping in place all the way around your first panel, you may be wondering just how I get my overlap so nice and tidy…? It’s really quite simple and if you read my previous post about how I LOVE using pins at times to keep things in place, you’ll understand exactly what I’m getting at here. Firstly, I pin the underside of the piping to the outer panel as shown. This helps keep it in place exactly where I want it. Once I’ve pinned/clipped the rest of the piping on and I’m back to the start, I tuck the raw end of the piping in to the starting point and fold the outer side over to encase the raw end. Clipping it in place, it is ready to sew!
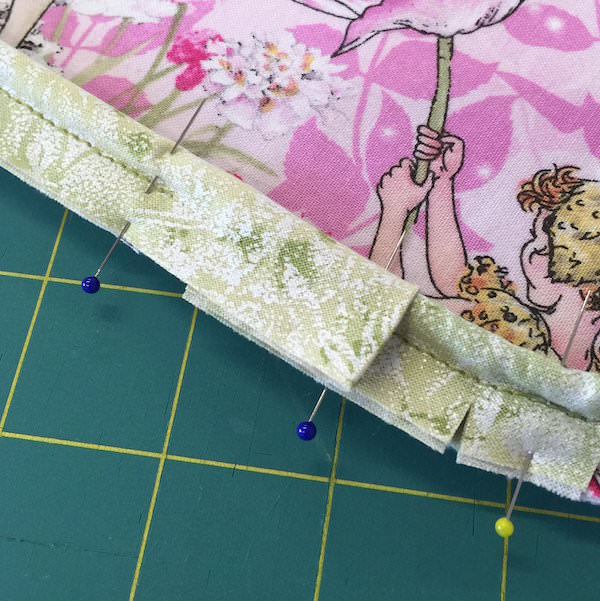

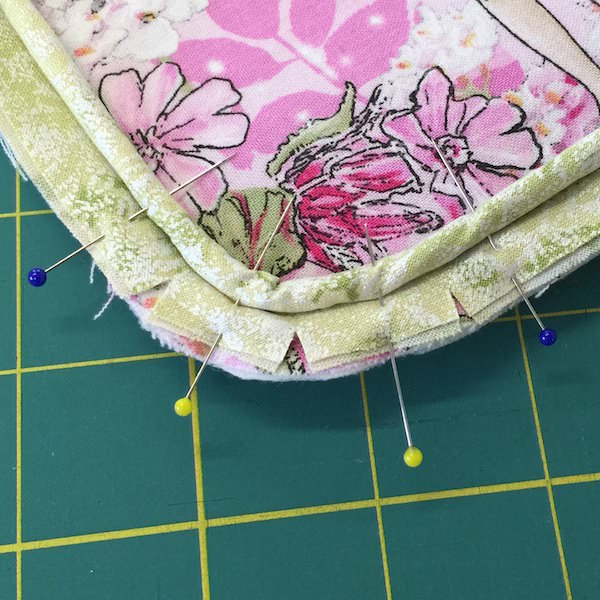
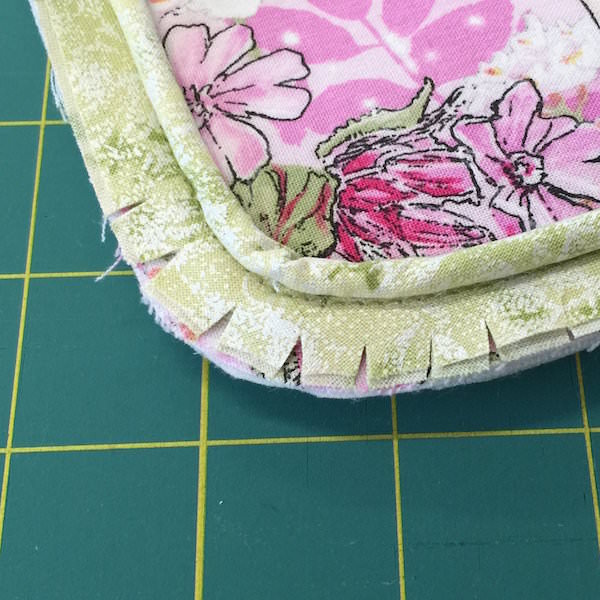
As I mentioned in my previous post, I find it almost imperative to use pins when attaching piping to corners. They ensure the piping stays exactly where you’ve put it, helping ensure you have a beautifully piped corner to show for it. However, sometimes when you remove the pins, the bias lifts up and you run the risk of it being caught in your seams. One trick I use for bias that has a mind of its own is to make more snips in it as it curves around the corner. This helps further reduce the tension in the fabric and you should find the bias sits flat for you (or very close anyway!).

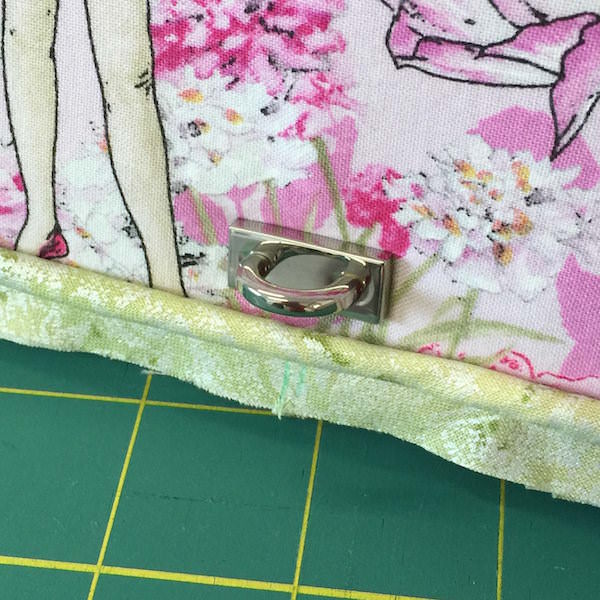
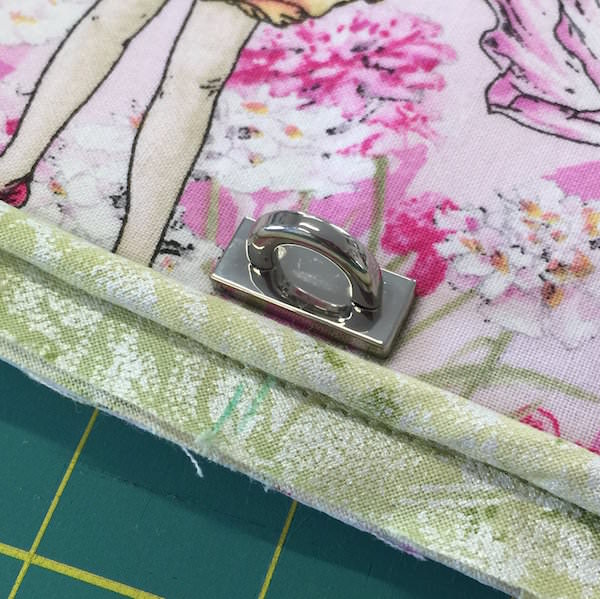
You may remember I mentioned in the first post for this sew along that I’m trying out a new product from Betty Box Pleat…? It was a gorgeous blingin’ swivel hook and an alternative to a d-ring – a loop instead that attaches in the same fashion as a magnetic snap. Well, now is the time to attach it – you will have already attached your second d-ring and loop along the bottom edge of the front panel as per step 36.
I placed it centered and just a smidge above the piping (o.k. so approximately 1/4″ (0.6cm) LOL!) and voila! I think it looks amazing, what do you think?
Congratulations! You now have the front and back outer panels complete! We’re going great!
See you next time when we create the top and base panels, and finally get to use that lovely long-pull zipper you have! Remember to share pics of your work as we go in my patterns group on Facebook and if you have any questions whatsoever, please feel free to comment below (or ask in my patterns group on Facebook).
Happy sewing!
Lisa x