
Pattern Hacks
The Stand Up Tote Gets Zipped!

Hi everyone! Oh boy, oh boy do I have an exciting pattern hack for you today and it’s something many of you have been asking about for a while now… Adding a zipper closure to the Stand Up & Tote Notice pattern!!! Hooray!!!
The ever-lovely Aimee from The Little Bird Designs has been hard at work this week figuring out exactly how to make this hack work, and for every size of the pattern as well. Phew! She has been super busy but it’s totally paid off as you’ll see below! Enjoy!! 🙂
Not familiar with the Stand Up & Tote Notice tote bag pattern? Not to worry! You can find it here.
I’m so excited to share this hack with you because I LOVE ZIPPERS! The great thing about adding a zipper to the top of your Stand Up Tote is that you can turn the small size into a lunch bag and keep everything inside nice and cold!
Before we start anything, you will want to make a copy of your Main Panel pattern piece. We are going to be cutting it up and won’t want to ruin your original pieces!
To add a recessed zipper to your next Stand Up Tote, you will need:
- The assembled outer of your tote (we won’t be messing with it!)
- Your lining fabric and interfacing but DO NOT CUT THEM YET!
- Your copy of the Main Panel pattern piece plus an extra sheet of paper
- 1 chunky/long pull zipper – 20″ (51cm) long (I like using a heavier zipper because it will last longer than a dress zipper!)
- Piece of fabric that is at least 16″ x 11″ (40.6cm x 28.5cm) for the zipper gusset
- Small strip of interfacing – 30″ x 3″ (76.2cm x 7.6cm)
Let’s get started with preparing your pattern!
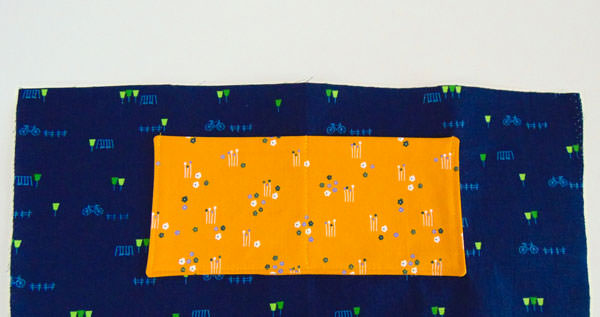
On your copy of the Main Panel pattern piece (it doesn’t matter which size you are making), we will be measuring 2” (5cm) down from under the “U” shape on the FOLD edge. Draw a straight line across the entire piece. Use the FOLD edge as your guide to keep the line straight.
Cut your piece along that line and keep both pieces. Label the top piece ‘A’ and the bottom piece ‘B’. Also make sure to mark the fold edge on piece A so you don’t forget!
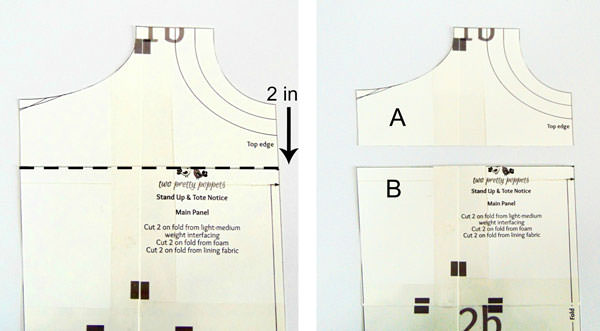
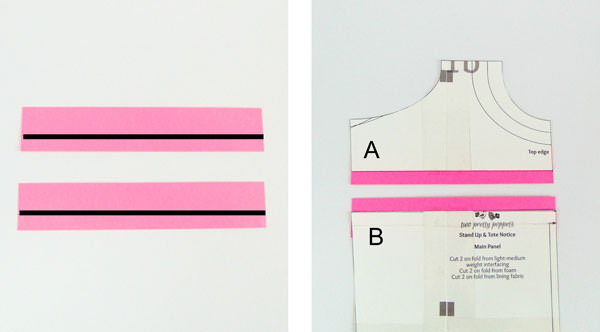
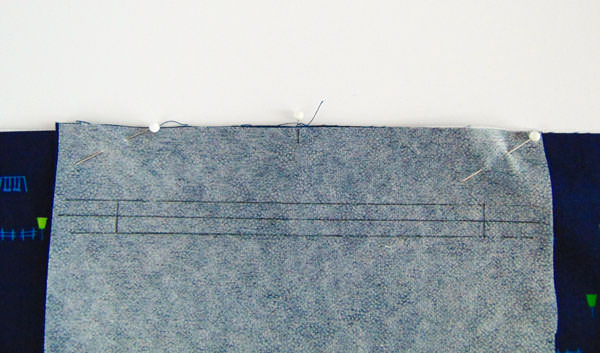
Take out your extra paper. Cut out two strips that are the width of your pattern piece and 1 1/2” (3.8cm) tall. Mark a 1/2” (1.3cm) line on each strip.
Using that line as a guide, tape one of your strips to the bottom of piece A and the top of piece B so that you have an overhang of 1/2” (1.3cm) on each piece. This will be your seam allowance! Trim the slanted edge of excess paper off piece B.
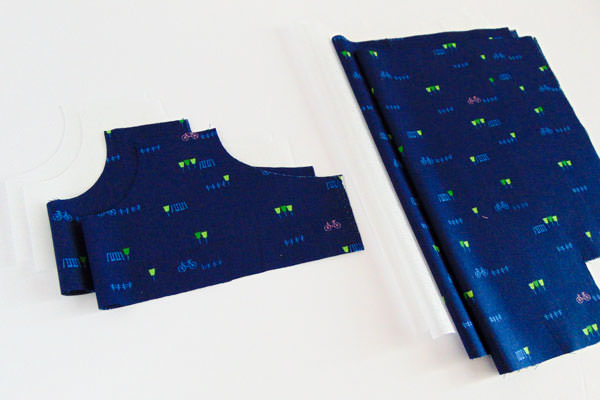
Time to cut your fabrics!
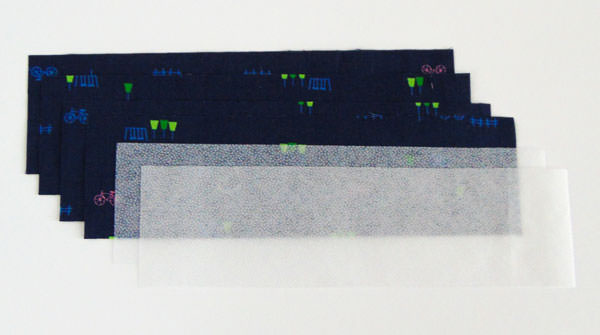
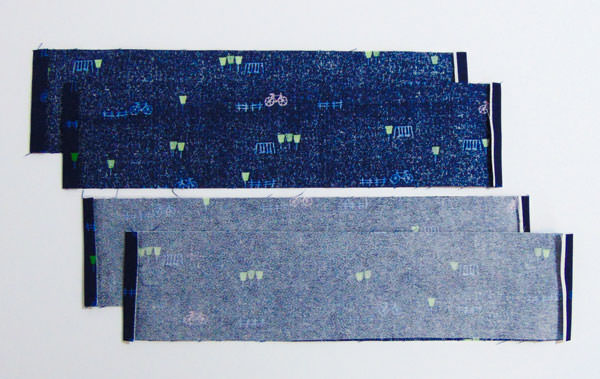
Cut out two each of piece A and piece B out of your fabric and interfacing. If you are adding pockets, cut those out too! (I’ll share where to place them soon!)
For your zipper gusset you will need to cut out four pieces of fabric and two pieces of interfacing that measure as follows:
- Small – 11” x 2 1/2” (28cm x 6.4cm)
- Medium – 13” x 2 1/2” (33cm x 6.4cm)
- Large – 15” x 3” (38cn x 7.6cm)
Fuse the interfacing to the wrong side of the two outer pieces of fabric.
Finally, you need a piece of fabric that is 3 1/4” x 2” (8.3cm x 5cm) for your zipper tab! Right, let’s get sewing!
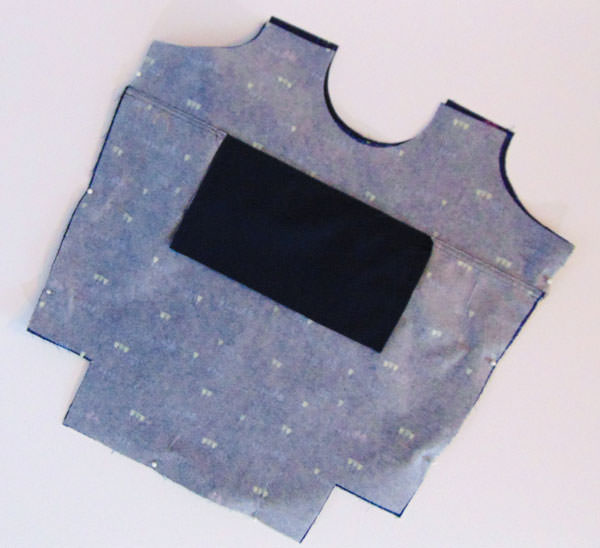
If you are adding pockets to your tote, you need to add them NOW before moving on to the next step.
For the slip pocket (as per the pattern), place it 1 1/2” (3.8cm) below the top edge of piece B – any higher and you won’t be able to get into it!
If you’re adding a zipper pocket like in Lisa’s hack here, line the top edge of the pocket with the top of piece B before sewing it.
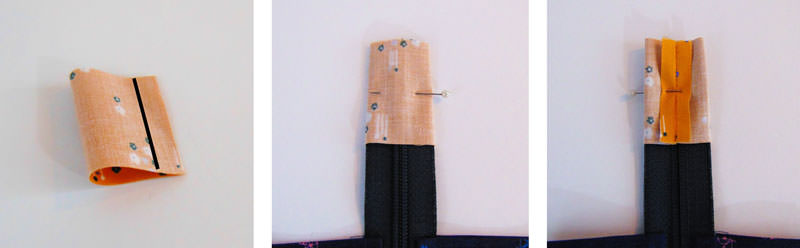
Take your zipper gusset pieces and fold the short ends in 1/4” (0.6cm) to the wrong side.
Mark 3/4” (1.9cm) in from the start of your zipper teeth and fold it as shown. Place a little hand stitch, or use glue, to hold it in place.

With your zipper open, place the folded corner 1/4” (0.6cm) in from the end of your gusset piece, right sides together with an interfaced piece. Place a non-interfaced gusset piece on top, so it is right sides together with the interfaced piece, sandwiching the zipper inside.
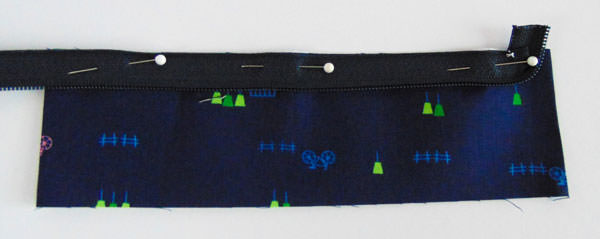
Stitch to join using a 1/4″ (0.6cm) seam allowance and trim the excess zipper tape off at the open end only.
Press the gusset panels away from the zipper and repeat to attach the remaining gusset panels to the remaining side of the zipper. Top stitch around each piece using a 1/8” (0.3cm) seam allowance.

At the closed end of your zipper, mark 3” and 3 1/2” (7.6cm and 8.9cm) out from the edge of your sewn gusset for the small and medium sizes. Cut the excess zipper tape off at the 3 1/2″ mark. NOTE: If you are making the large size, mark 4 1/2” and 5” (11.5cm and 12.7cm), and cut at the 5″ mark.
Take your zipper tab fabric and fold it half matching short sides. Stitch using a 1/2” (1.3cm) seam allowance.
Slide the tab onto the end of your zipper, ensuring the seam is centred underneath on the ‘wrong side’ of the zipper tape, and the outer raw edge of the zipper tab is level with the end of the zipper. Stitch in place 1/2” (1.3cm) down from the end of the zipper/zipper tab.
Fold the tab off the zipper and tuck the raw edge in 1/4” (0.6cm).

Press well and top stitch around all 4 sides to finish.

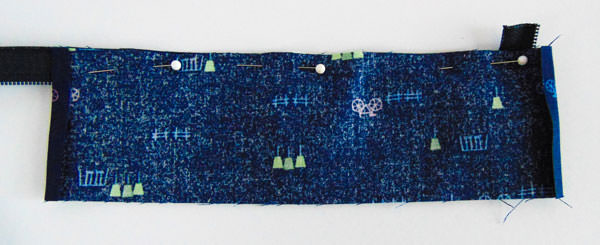
Find the middle of your zipper gusset as well as your bottom lining piece B. Place your zipper gusset right side UP on top of piece B and baste in place using a 1/4” (0.6cm) seam allowance.
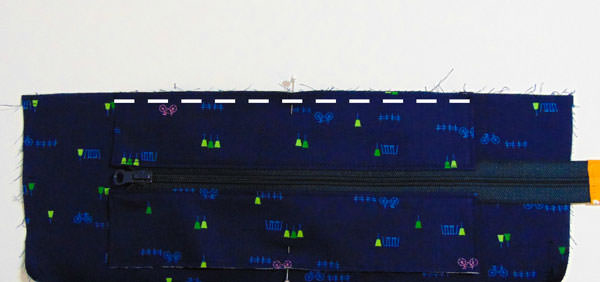
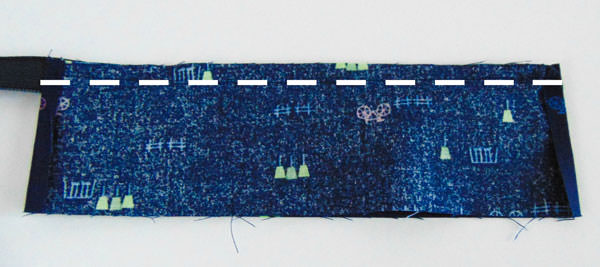
Now place piece A on top, right side DOWN, and stitch to attach using a 1/2” (1.3cm) seam allowance.
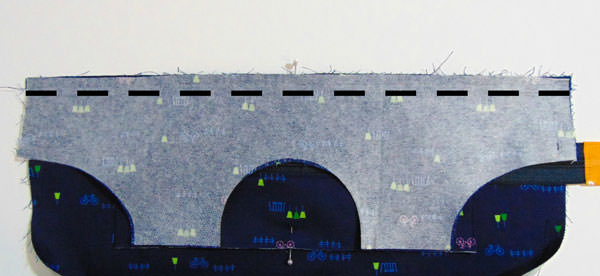
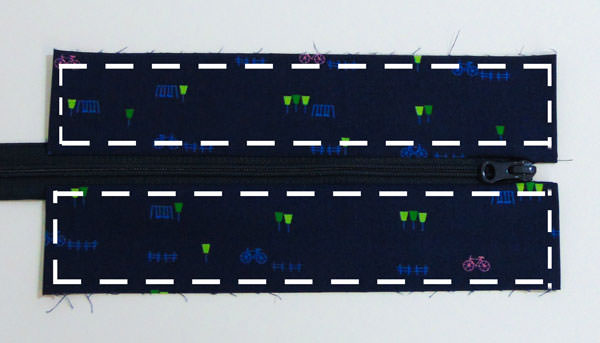
Trim your seam allowance to 1/4” (0.6cm) and press the seam UP towards the top. Top stitch using a 1/8″ (0.3cm) seam allowance.

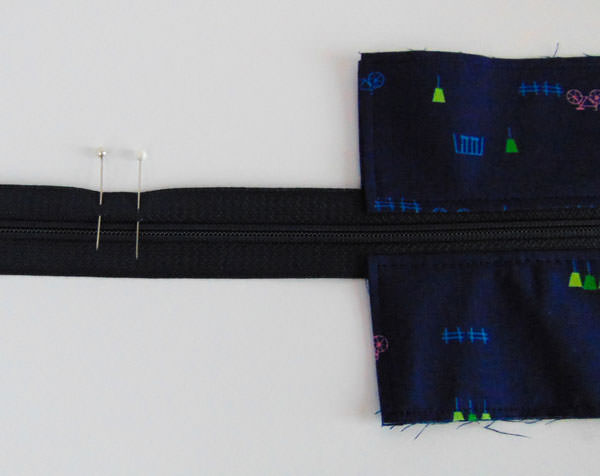
Repeat for the other side. Tip: it is easier to stitch the other side if you open the zipper before pinning and stitching!
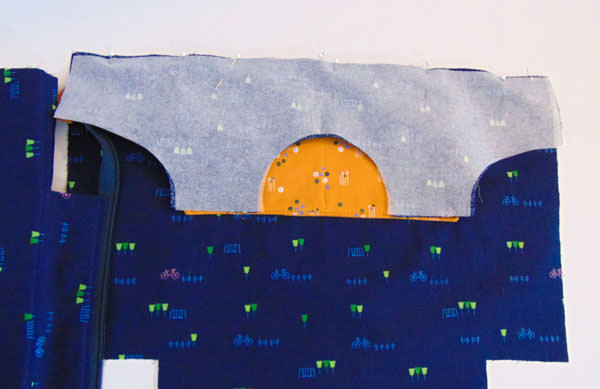
Making sure the zipper/attached assembled panels are not twisted, go ahead and sew the sides and bottom edge of the lining as per the pattern instructions.
You can now assemble the bag as per the pattern instructions, BUT make sure you open the zipper first otherwise you won’t be able to turn your bag at the end!

Tip: When you top stitch, it’s much easier to do if the zipper is open as well!
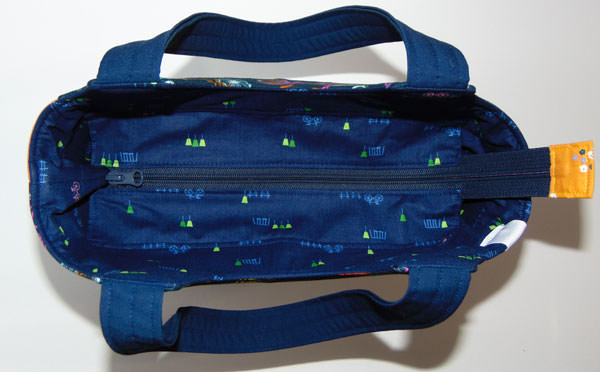
Now you can admire your new zipper top Stand Up Tote that will keep everything safe inside!


And that’s it! How easy was that?! Thank you for another amazing tutorial Aimee!
You can see more of Aimee’s amazing bags via any of her social media below –
- Website – www.thelittlebirddesigns.com
- Facebook page – www.facebook.com/Thelittlebirddesigns
- Instagram – www.instagram.com/lilbirdsdesign
I can see this hack being useful in sooooo many ways… What are some of the ways YOU think this hack would be useful for the Stand Up Tote?
Click here to find out more about the Stand Up & Tote Notice tote bag pattern and until next time, happy sewing! Lisa x
Lisa that was a wonderful addition to Stand Up Tote. I love this pattern have even made as gifts which they love. This new additon of a zipper brings the tote to a new level. Thanks so much