
Tips & Tricks
Tips for Better Bag Making

This week Lisa and I have put together some of our favourite tips to help you improve your bag making skills. These tips will help you achieve beautiful results and maybe even speed up your time prepping and creating! Have a look through our list below.
Test Squares
This is the most important tip of all! Check that test square every time you print a pattern. I always do that page first BEFORE printing anything else so I can be sure my printer is listening! Make sure your settings are set to “100%” or “Actual Size” so that the square comes out the correct size. The best ruler to check it with is a quilting ruler. While a smidgen off might seem like nothing, it will actually alter how things come together especially pieces with curves!
Note – make sure print shops are checking that test square as well! (I recently ordered some paper pieced patterns and completely forget to have them print it at 100% and my blocks are half inch smaller than the original! Learn from my mistake!)

Instructions
Read through your entire pattern before cutting or sewing anything. While it may be tempting to just hop right to your rotary cutter, reading through gives you a chance to see where each piece goes. It also gives you a chance to estimate how long your project will take and see how the bag goes together.
Sometimes a step won’t make sense as a single step, but trust the designer and their method, and do as the pattern tells you to (not what you think you should be doing). Our trusty designers have put a lot of work into each pattern. I promise that it will all make sense in the end!

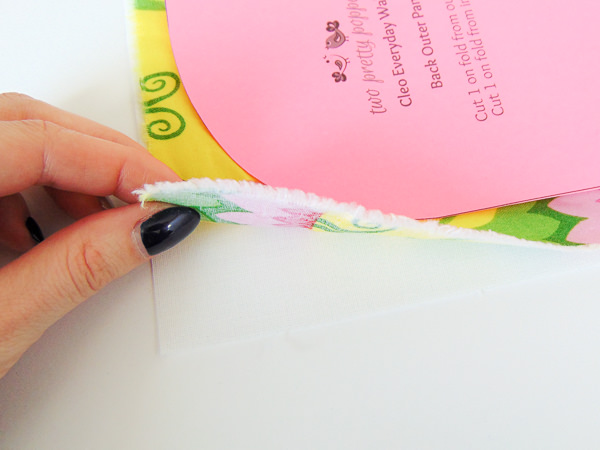
Pattern Pieces
One thing I personally do to make my bag making speedy, is to print all PDF pattern pieces onto card-stock. Not only does this make the pattern last longer BUT you can also cut around the pattern pieces with your rotary cutter. If you nick a corner and cut it off, it’s quick and easy to print a new piece! Some print shops will even print the large print options onto card-stock or something similar though the price will be higher!

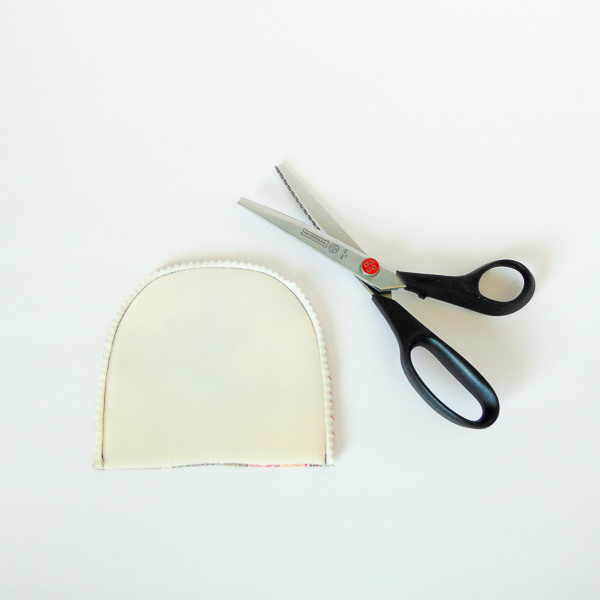
Curves
Before turning your curved pieces after they have been sewn, use a pair of Pinking Shears to clip the curve. While snipping out notches is totally acceptable, your pinking shears are a lot faster and you can trim to a 1/4 inch without the fear of snipping notches into your seam!
Cutting
To save time when cutting out your fabric and interfacing, lay the two together before cutting. Chops your cutting time in half and ensures your pieces are the same size when you go to fuse them together.
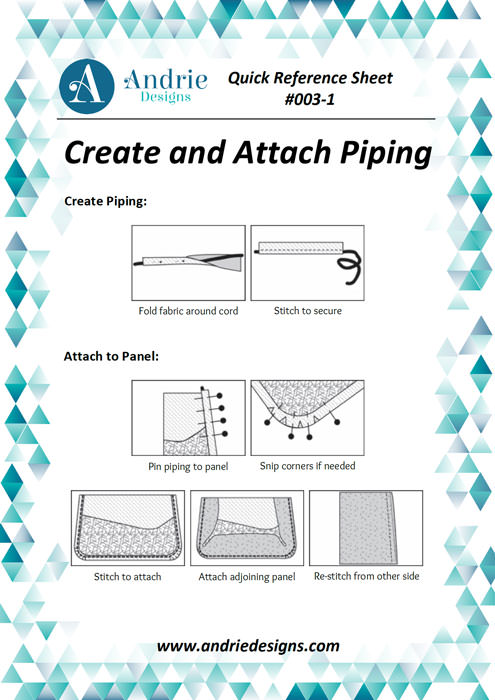
Piping
Lisa has some incredible tips to apply piping on the Tutorials page but what happens if you don’t have a piping foot? Simply use your zipper foot instead like Lisa does! Though it doesn’t have the same style notch, it does give you the ability to get up close and personal to your piping edge! Plus it helps you keep the piping flat as you sew around curves!
Bobbins and Thread
Pre-make bobbins ahead of time to match your thread. Nothing is worse than having to stop mid sewing session to wind a bobbin! I go through my project and guess what colours I might need and go from there. Also yes, these are my bobbins! I do have another with neutrals because I am an overachiever and like to be prepared 😉 (Aimee)

Topstitching
When doing your final top-stitching, using a walking foot is your best bet to move those layers along smoothly and effortlessly. If you don’t have a walking foot, increase your stitch length. What this does is force the feed dogs underneath to pull a little slower and at longer lengths making your stitching a breeze! Just check out that beautiful top stitching on this Summertime Sling!

For additional tips on bag making, check out the Tips & Tricks blog category as well as the Tutorials page!
What is your favourite tip from our list? Anything you think we should add? Let us know how these tips helped you out!
Happy Bag Making!
-Lisa and Aimee x
Thanks for all tips! They are great!
You’re most welcome Gladys! 🙂
Wow- triming curves with pinking scissors is genius! Good-bye snipped seams😄😄
Thanks Lee-Anne and yes, it certainly makes that job a little easier, that’s for sure! 🙂
Loved reading your tips especially the use of pinking shears.
Thanks Lynn! Hope it helps speed things up a little for you! 🙂
Do you have Tips for making leather bags and working with leather generally?
Hi Craig, unfortunately no I don’t as I predominantly work with fabric and cork.