
Tips & Tricks
Creating a Double Sided Strap
Hi there! Soooo….. Since I posted my double sided strap a couple of weeks ago, I’ve had numerous people ask me how I made it and if I’d be willing to put together a tutorial so they can have a go themselves. Naturally I said yes and, well, here it is!
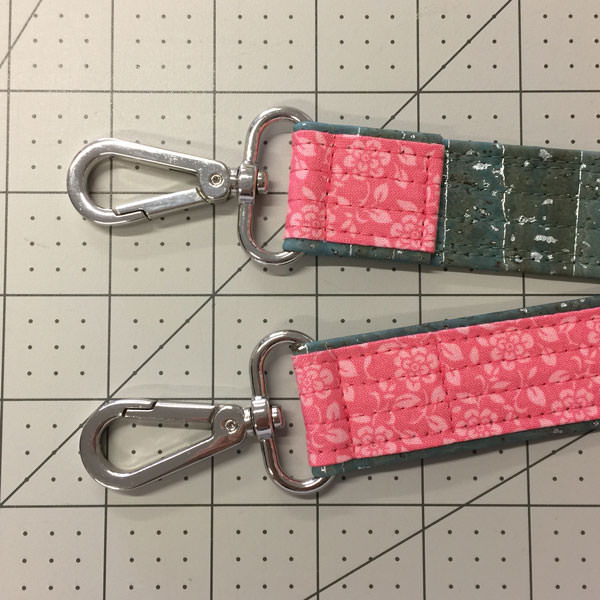
In a nutshell, I class a strap as ‘double sided’ if it has one material (such as quilting cotton) on one side, and a different material (such as cork or leather), on the other side. To make it really stand out, I like to make the ‘top material’ slightly narrower so the ‘bottom material’ can be easily seen down each side.
PLUS! Click here to find the tutorial on how to make double sided wrist straps!
So, without further ado, let’s get started!
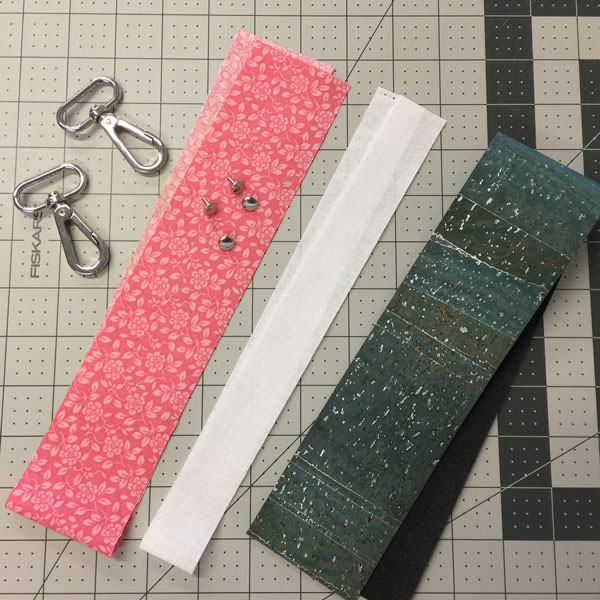
To make a double sided strap you will need (cut sizes to follow):
- A piece of ‘bottom material’ – I’m using cork, however you could also use leather or vinyl
- A piece of ‘top material’ – I’m using quilting cotton
- A piece of light-medium weight fusible interfacing
- 2 swivel hooks – mine are 1 1/4″ (3.2cm) size
- Rivets to finish (optional) – mine are 9mm size
- Thread, tape/glue (most important!) and general sewing supplies
1. Cut your pieces as follows (but first, take a deep breath as there’s a little bit of maths involved… However, if you work through it systematically, it will all work out… Trust the process):
- Bottom material (i.e. cork) – WIDTH = size of hardware x 2; LENGTH = as directed by pattern
- My example – WIDTH = 1 1/4″ x 2 = 2 1/2″ (3.2cm x 2 = 6.4cm); LENGTH = 20″ (51cm)
- Therefore, for my example – cut one piece measuring 2 1/2″ x 20″ (6.4cm x 51cm)
- Top material (i.e. quilting cotton) – WIDTH = size of hardware x 2, less 3/8″ (1cm); LENGTH = length of bottom material + 2″ (5cm)
- My example – WIDTH = 1 1/4″ x 2 = 2 1/2″, less 3/8″ = 2 1/8″ (3.2cm x 2 = 6.4cm, less 1cm = 5.4cm); LENGTH = 20″ + 2″ = 22″ (51cm + 5cm = 56cm)
- Therefore, for my example – cut one piece measuring 2 1/8″ x 22″ (5.4cm x 56cm)
- Interfacing – WIDTH = size of hardware less 1/4″ (0.6cm); LENGTH = length of top material
- My example – WIDTH = 1 1/4″ less 1/4″ = 1″ (3.2cm less 0.6cm = 2.6cm, though to keep it simple we’ll use the common conversion of 2.5cm); LENGTH = 22″ (56cm)
- Therefore, for my example – cut one piece measuring 1″ x 22″ (2.5cm x 56cm)
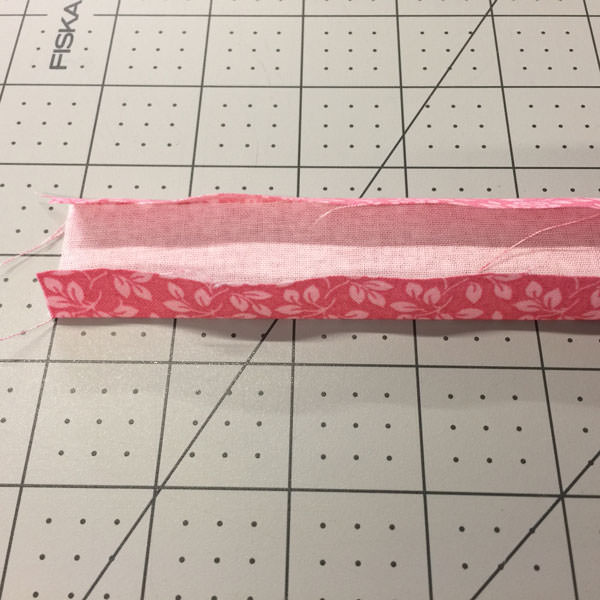
2. Fuse the interfacing down the centre of the top fabric (i.e. quilting cotton; I’ll refer to it as ‘fabric’ from now on), on the wrong side, ensuring the interfacing is as centred as possible along the entire length of the fabric.
Fold and press each long side of the fabric over and onto the interfacing. Glue/tape the long sides in place. Set aside for now.


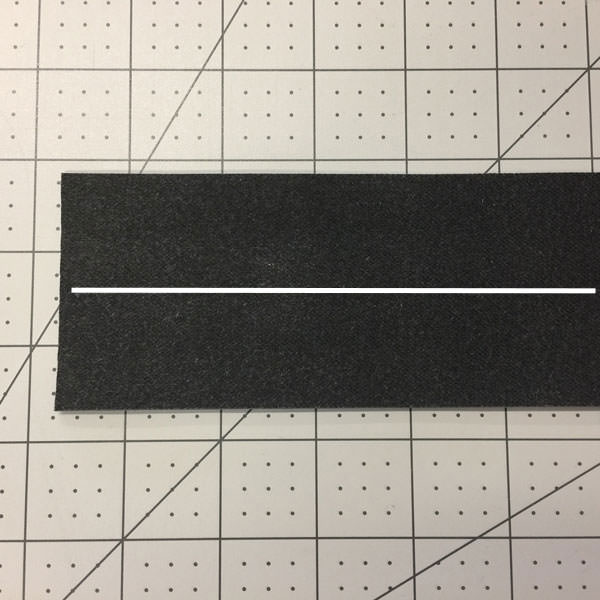
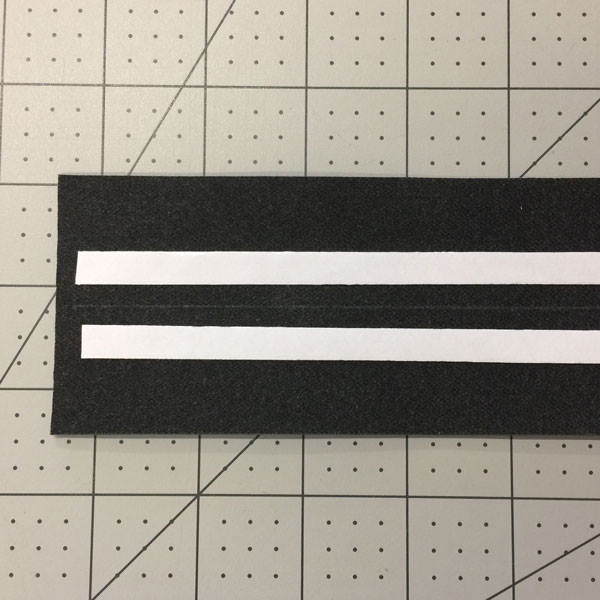
3. Take your bottom fabric (i.e. cork, vinyl or leather; I’ll refer to it as ‘cork’ from now on as that’s what I’ve used) and draw a line down the centre, on the wrong side, running parallel with the long edges. In my example, my line is 1 1/4″ (3.2cm) in from each long edge.
Place a strip of tape either side of the centre line, running the entire length of the strip (or use glue once you get to the next step).
Working down one long side at a time, remove backing from the tape (or apply glue) and fold the long edge over to the centre line you’ve drawn, wrong sides together. Press firmly in place to adhere.
Repeat to fold and adhere the second long side, ensuring both long raw edges meet in the middle at the line you drew earlier.

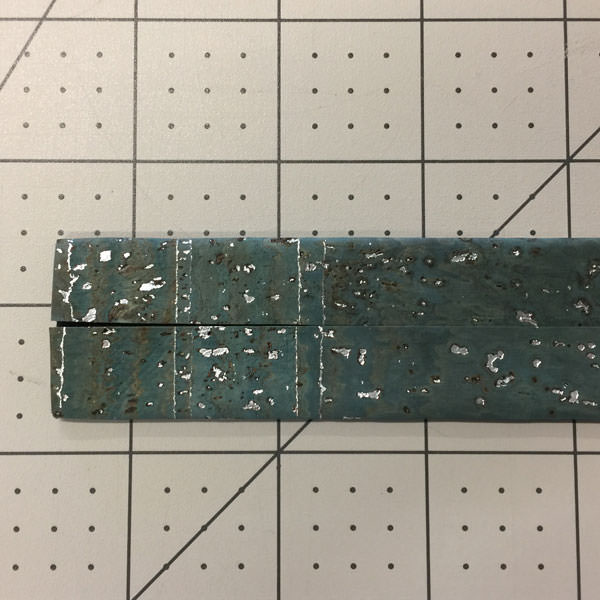
Top stitch using a 1/8″ (0.3cm) seam allowance down each long side to secure. I like to lengthen my stitch length a little more than for regular top stitching when working with cork – it usually ends up around 3.5mm long.

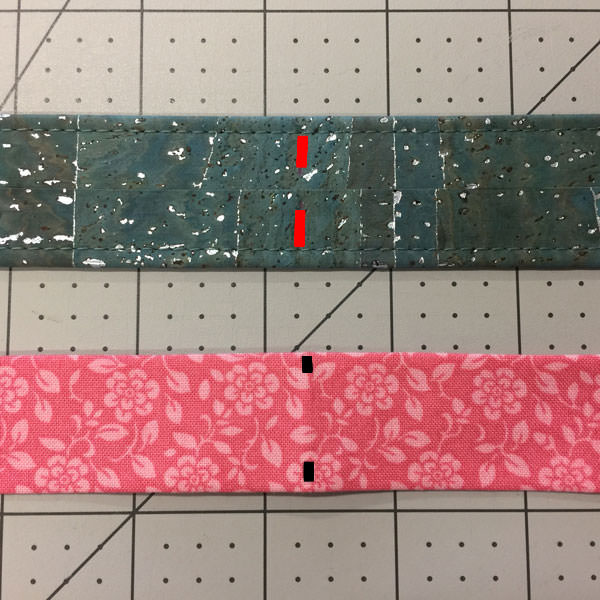
4. Fold your cork strip in half matching short raw edges. Mark the centre on the wrong side of the strip (the side where the folded edges meet in the middle).
Fold your fabric strip in half matching short raw edges. Mark the centre on the right side of the strip (the side that DOES NOT show the folded edges meeting in the middle).
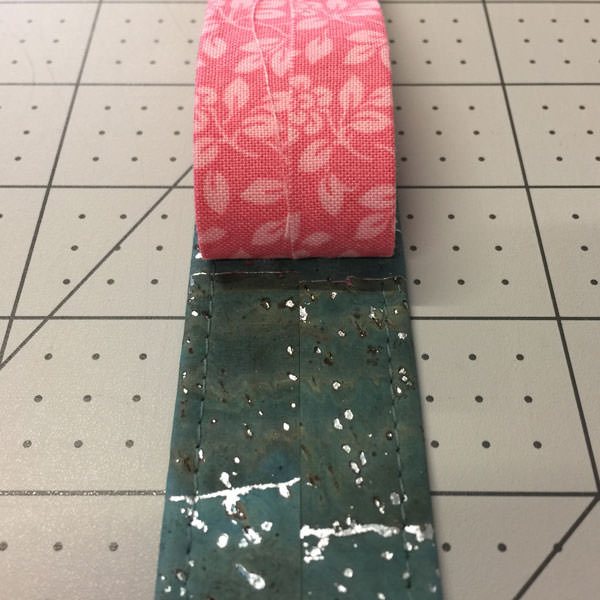
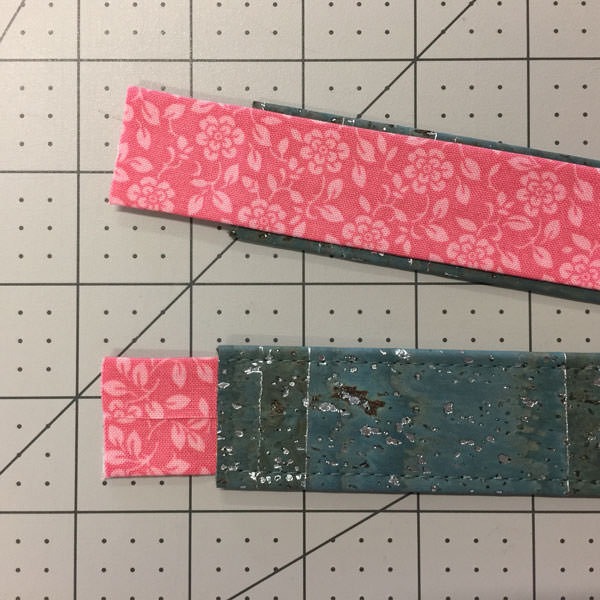
Place the fabric strip right side up (folded edges down) on top of the cork strip, wrong side up (folded edges up). Match centre marks, and centre the fabric strip down the middle of the cork – all going to plan, there should be approximately a 1/8″ (0.3cm) length of cork peeking out each side of your fabric strip.
Working from the centre out, align and glue/tape the fabric strip in place along the entire length of the cork strip. Once fully adhered, there should be a 1″ (5cm) overhang of fabric at each end.

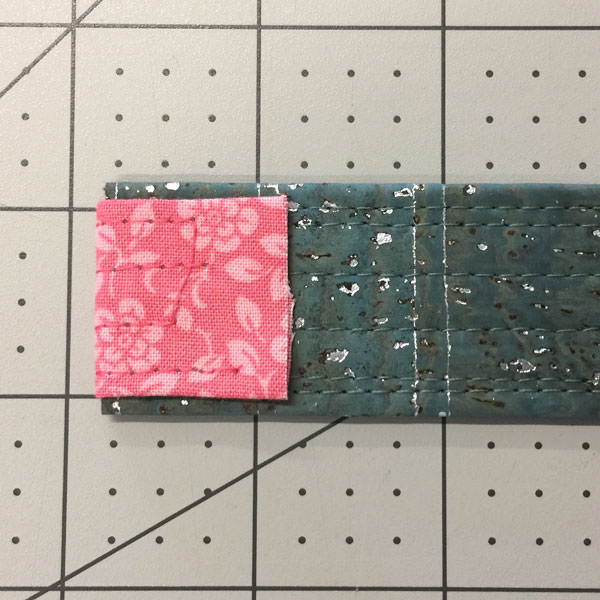
Top stitch to secure with the fabric side of the strap facing UP. Use a 1/8″ (0.3cm) seam allowance and use the edge of the fabric strip as your guide (NOT the edge of the cork). Stitch down both sides of the strap to secure.
I also like to stitch a couple of rows down the centre as well. In this example, I stitched 1/4″ (0.6cm) in from each 1/8″ (0.3cm) row on either side to finish.

5. At each end of the strap, fold the overhanging fabric over to the right side of the cork (which is the bottom of the strap) and glue/tape in place. Ensure the fold of the fabric is snug up against the raw edge of the cork so it is a tight fold.
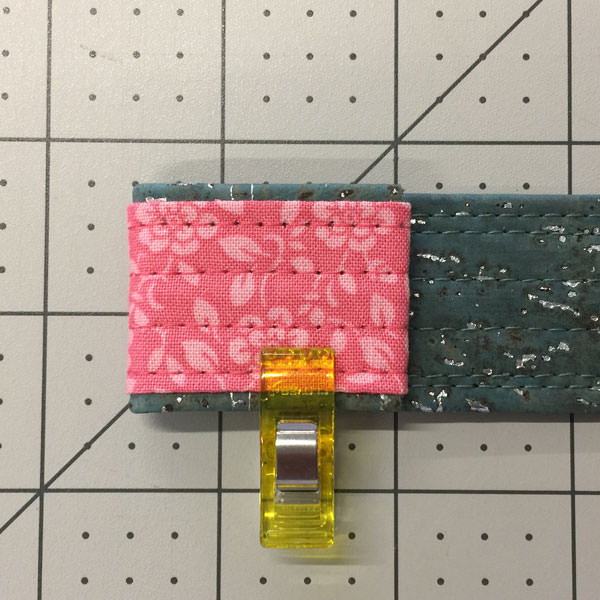
Fold a ‘finished’ end of the strap over 1 1/2″ (3.8cm) to the right side of the cork (the bottom of the strap) and finger press well.
Slot a swivel hook into the fold and glue/tape in place.
Stitch to secure using two rows of top stitching:
- 1st row – 1/8″ (0.3cm) in from the ‘finished’ end of the strap
- 2nd row – right up under the swivel hook (you may need to use your zipper foot)

Repeat to attach the remaining swivel hook onto the other end of the strap.
Ooh how pretty does it look already?! Time for a little bling I reckon!
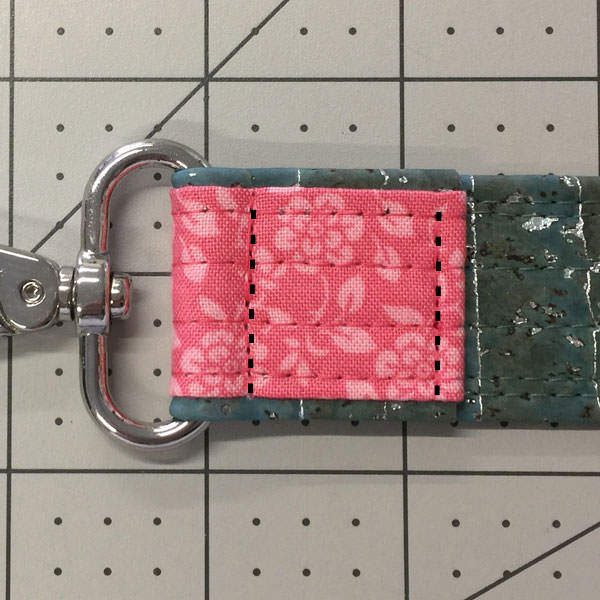
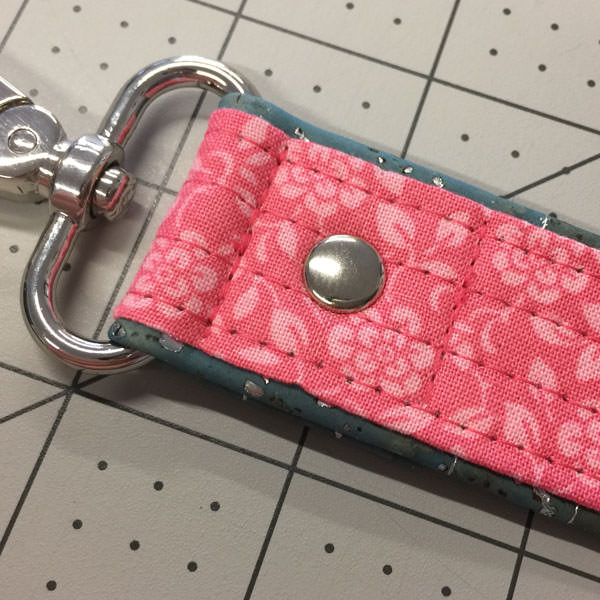
6. Mark the position of the first rivet at one end of the strap. I like to position them centred between the horizontal rows of top stitching, as well as centred between the two rows I just made to secure the swivel hook in place.
Install the first rivet at this mark. For help on installing rivets, see the Hardware Heaven: Rivets blog post here.
Repeat to install the remaining rivet at the other end of the strap and you are done! Too easy!

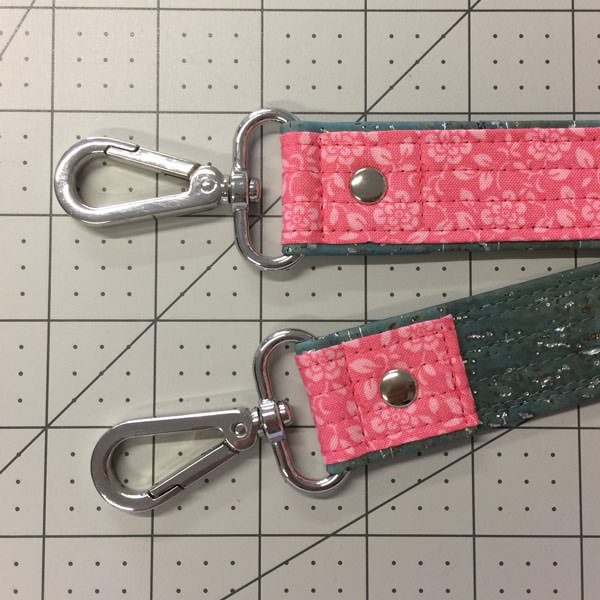
Ooh sew pretty! (I can’t help but loooovvveeeee shiny hardware!)
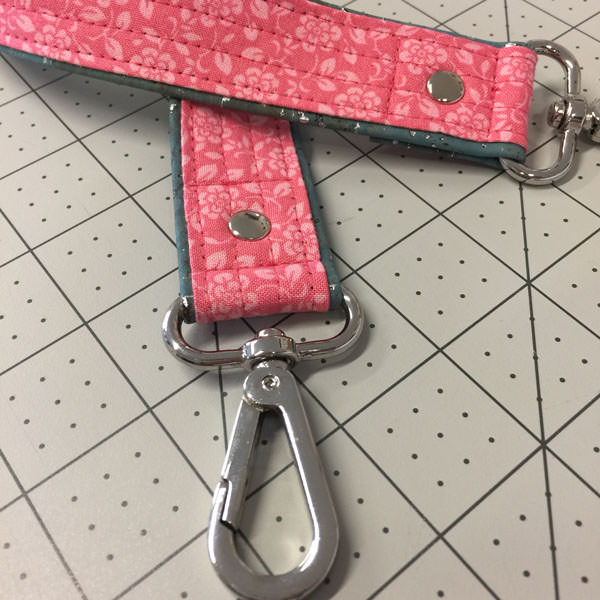
It’s pretty cute for a mini strap measuring all of 17″ (43cm) long!

Suppliers!
- Cork – Voodoo Rabbit Fabric
- Swivel hooks and rivets – Betty Box Pleat
I hope you’ve found this tutorial useful and that I’ve inspired you to have a go at making your own double sided strap! If you’re in need of just the right pattern to use this technique on, well, um… perhaps check back here in a couple of days time… *hint hint* 🙂
PLUS! Click here to find the tutorial on how to make double sided wrist straps!
Feel free to leave a comment and let me know if I’ve inspired you!
Lisa x
That was great!
Thank you Tricia! 🙂
Awesome!! Thank you so much for this. Can’t wait to try it. ( and will be looking for your hint hint in a couple of days.) 🙂
Thanks Dyan and you’re welcome!! Can’t wait to see what you come up with! 🙂
Terrific tutorial! Thanks for taking time to do this.
Thanks Janet and my pleasure! Enjoy! 🙂
Thank you so much! Can’t wait to do this with my next bag!
Pleasure Terri! Have fun! 🙂
Hi Lisa. Thanks for the great idea. I already know what straps has my next bag (sports bag) 🙂
Many greetings from Potsdam, Germany.
You’re welcome and hi from down under! (Australia) ?
Brilliant – I had worked out a way, but yours is much simpler! Love it!
Oh wonderful! Happy sewing Trisha! 🙂
I will definitely be trying this soon! Thank you for sharing! ??
You’re welcome Denise! Have fun!! 🙂
Thank you so much for sharing. I look forward to using this on my own bags.
You’re most welcome Carol! Enjoy! 🙂
Pingback: Classic Carryall Handbag & Tote - Andrie Designs formerly Two Pretty Poppets
Genius! It’s so pretty! And finished beautifully with the bonus of extra wearing power using two fabrics. Will use this to make handles for my baby grandson’s carry-all bag.
Thank you ?
❤
Thank you Carol! Can’t wait to see the handles you make for your baby grandson’s carryall bag! Happy sewing! 🙂
Great tutorial. I was just getting ready to use some if my new cork and trying to figure out what to do for the straps. Thank you so much for this beautifully detailed info.
Thank you Sandra – sounds like great timing! Happy creating! ?
Pingback: Bag Making – Double-Sided Strap Tutorial – SEWING PATTERN TESTERS
Thank you Lisa for a very thorough tutorial.
My pleasure Barbara! 🙂
Wow!! That is beautiful and even though it takes a little work, it’s totally doable!! Thank you for your generosity!
Such a clean and easy technique. I’m so glad I found your website. I’m on my way to go try this. Thank you!
Just referred to your site for this tutorial and it is great. Very clear instructions and I love the look of the double sided straps. Thank you.
Welcome Darla! Glad you found the tutorial helpful and easy to follow! Happy sewing! 🙂
This works well with webbing as the bottom. It makes a professional look. Just fold the top fabric in and stitch it down on top the webbing. I’ve been making straps like that for years.
Webbing works great too Karol!