Pattern Hacks
Stand Up Clutch Crossbody Strap Hack

Hello bag makers! As many of you know, the Stand Up Clutch is a personal favourite of mine. I love piecing together all kinds of prints for this sweet little clutch. I am showing you how to turn this clutch into a small crossbody bag this week! Read on to see how I add this crossbody strap below!
Not familiar with the Stand Up Clutch pattern? Not to worry! You can find it here.
What you need:
- Fabric for the strap 4″ (10cm) by chosen length. (General recommended length is 60″ (152cm) long)
- Interfacing 2″ (5cm) by chosen length
- 2 Strap connectors at 4″ x 4″ (10cm x 10cm)
- 2 Strap connector interfacing at 2″ x 4″ (5cm x 10cm)
- 1″ strap slider
- 2 – 2″ (2cm) rectangle rings (or D-rings)

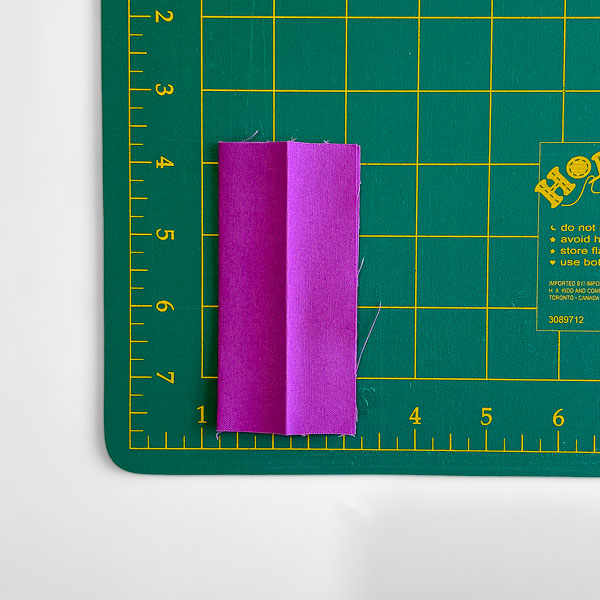
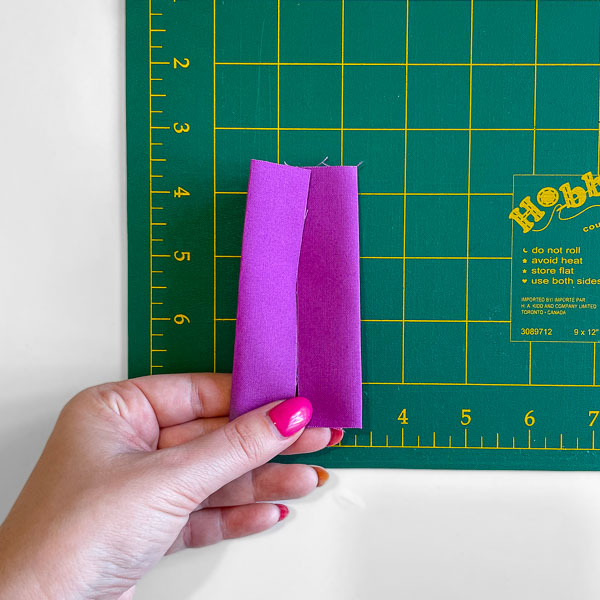
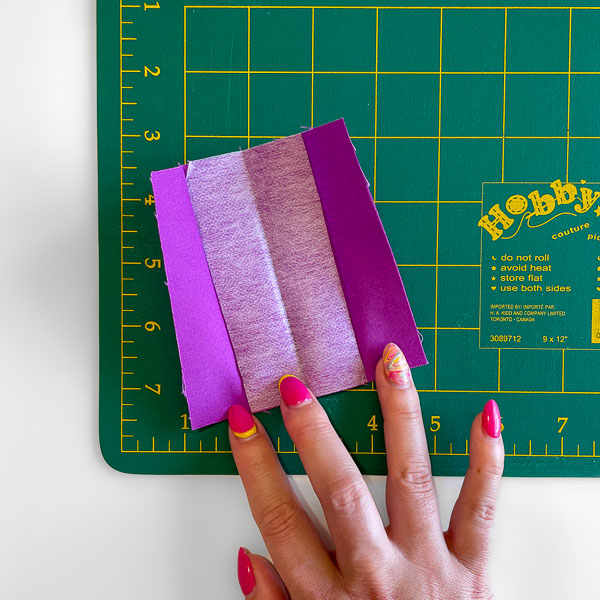
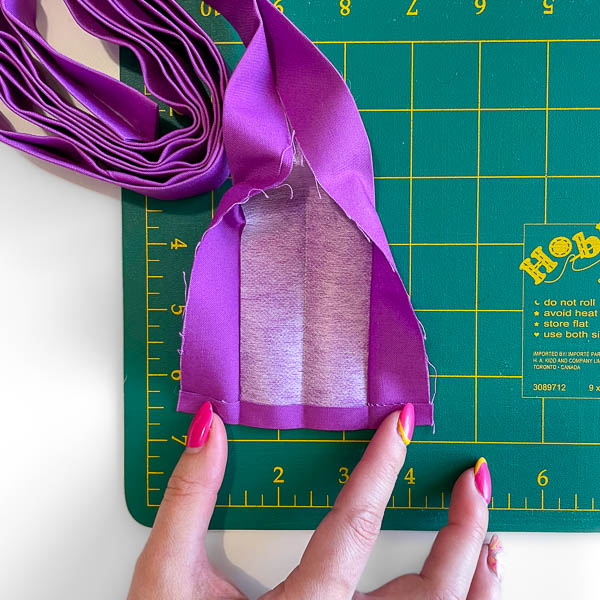
Take your strap connector and fold it in half with the wrong sides together, matching long sides. Press. Open it out and fold each side into the middle. Press. Open back up and place interfacing along the middle, fold up and press well.

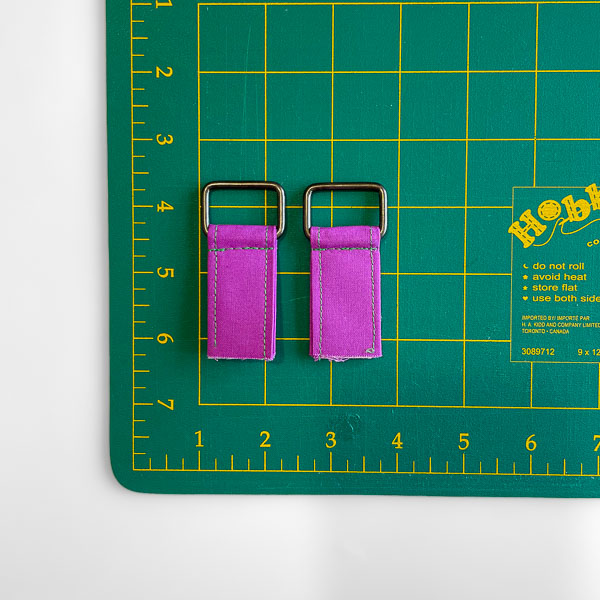
Slide on rectangle rings, fold in half and sew close to the edge.
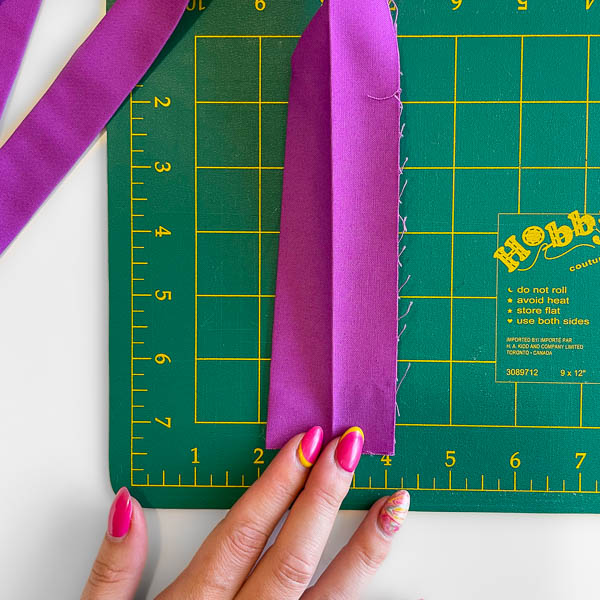
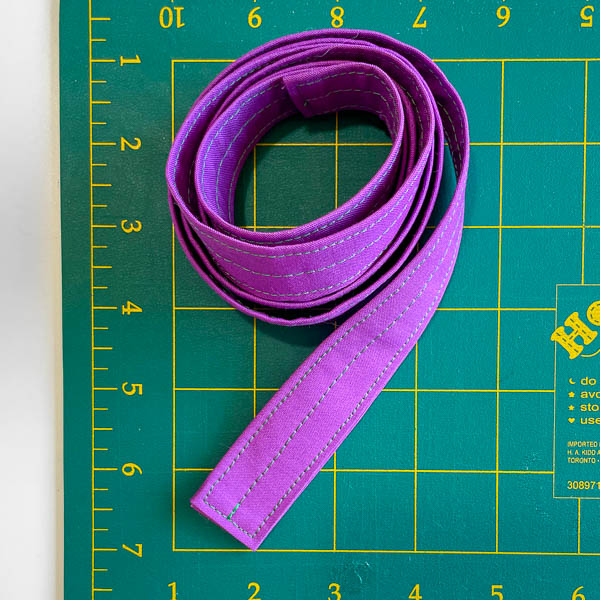
Take your strap and fold it in half with the wrong sides together, matching long sides. Press. Open it out and fold each side into the middle. Press. Open back up and place interfacing along the middle, fold up and press well.
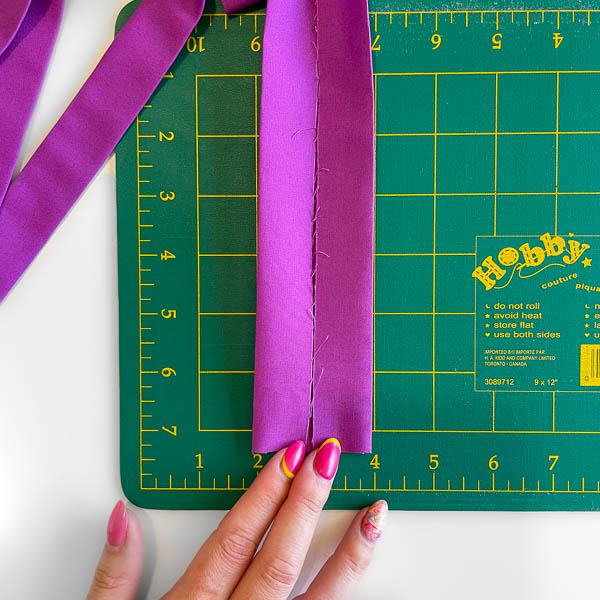
Unfold strap completely, fold short ends in 1/4″ (0.6cm) and press. Re-fold the strap and press well.

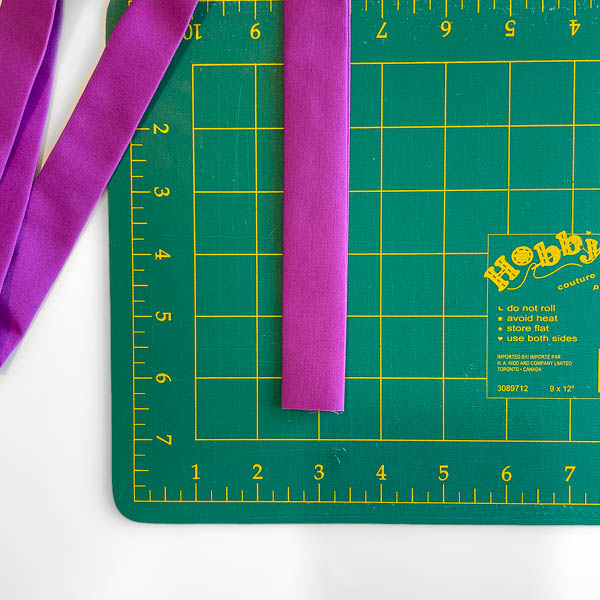
Topstitch around all four sides using a 1/8” (0.3cm) seam allowance. (I like to do a third row of stitching down the middle!)
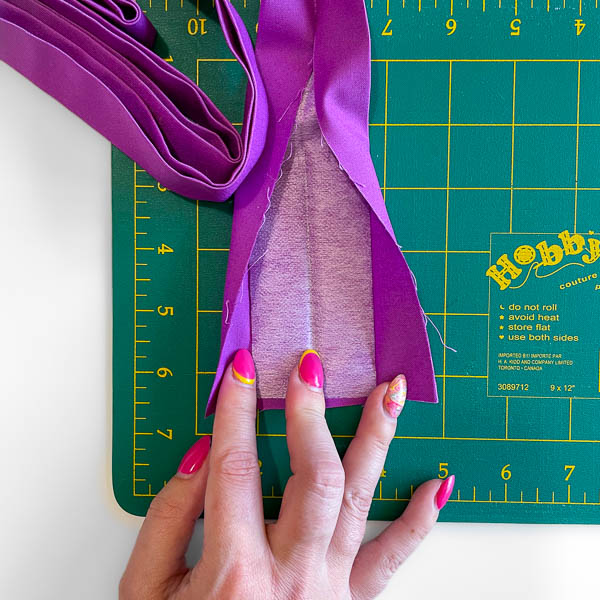
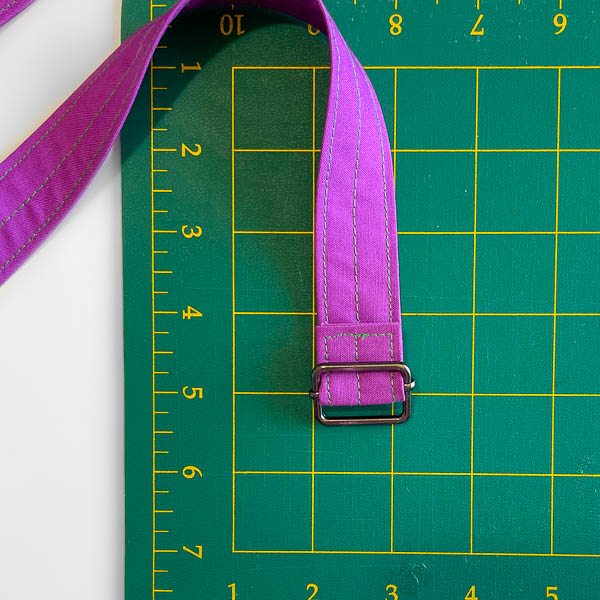
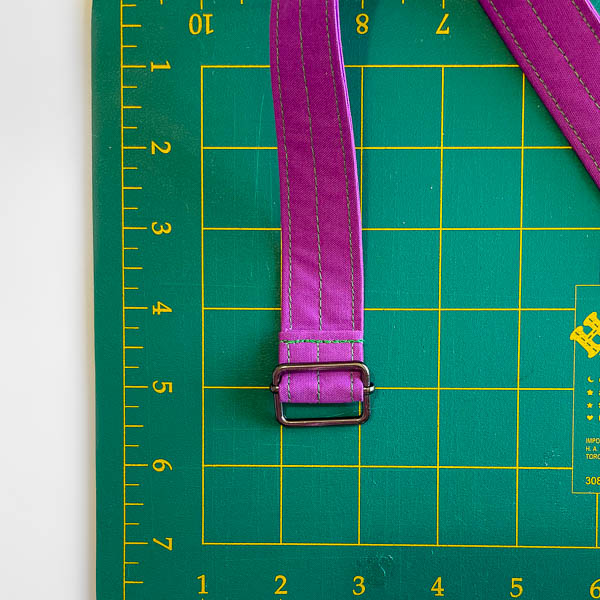
Fold each end under 1” (2.5cm) to the ‘wrong side’ of the strap and press well.

Feed one end up through one side of the slider, over the centre bar, and back down the other side, slotting the centre bar into the fold. Pin in place and stitch 2 – 3 times to secure along the 1/8” (0.3cm) row of topstitching you made earlier. Set aside for now.
Take one completed side of the clutch and lay it face up on your workspace. Make a mark 1.5″ (3.8cm) in from the left edge. Place one strap connector here and baste in place using a 1/4″ (0.6cm) seam allowance.
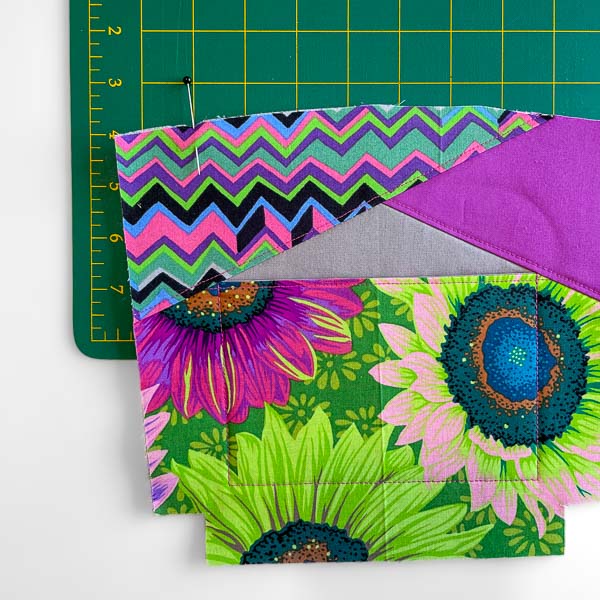
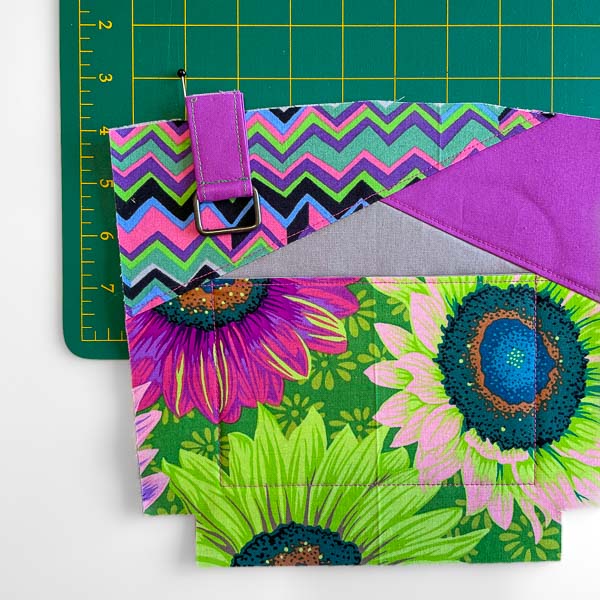

Repeat for the front so you have two exterior pieces that look the same. When placed wrong sides together, you’ll see that the connectors land on opposite sides!
Complete your clutch as you chose and come back for the strap! I will be finishing as per the Stand Up Clutch gets Zipped tutorial!

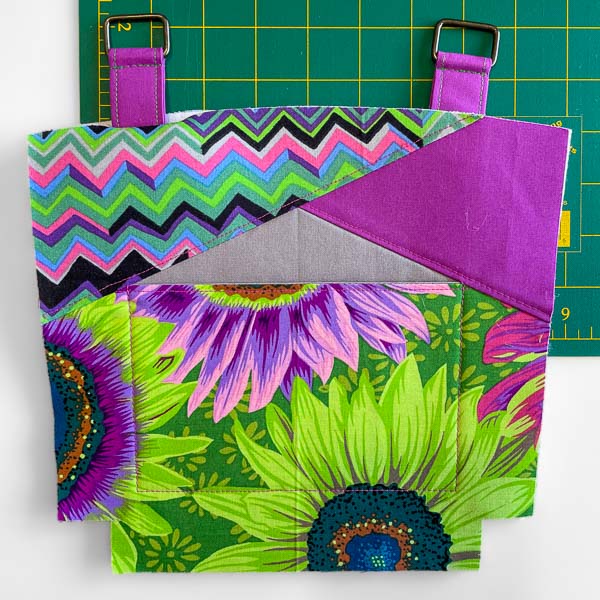
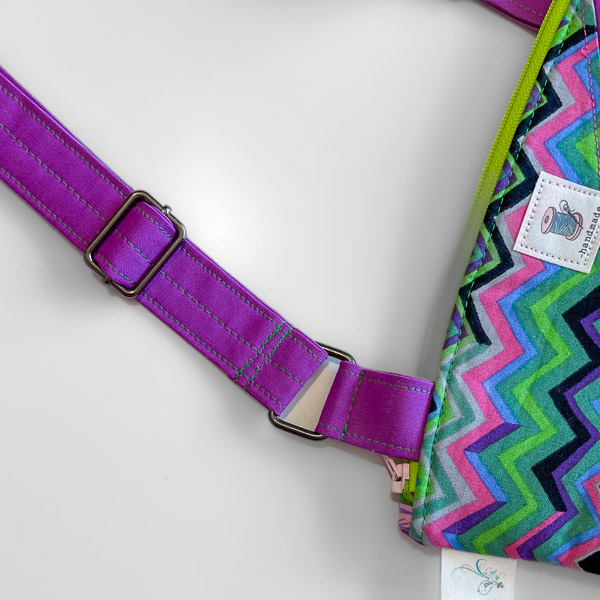
Take the shoulder strap and feed the end that doesn’t have the slider attached through one of the rectangular rings, ensuring that you are threading it towards the back of the clutch.
Feed this same end up through the slider, over the centre bar and back down, so the end attached to the slider is sandwiched between the strap.
Feed the end of the strap through the rectangular ring on the other side, ensuring the strap is not twisted. Slot the rectangular ring into the fold and stitch 2 – 3 times to secure along the 1/8” (0.3cm) row of topstitching you made earlier and as close to the rectangular ring as possible (two rows of stitching).
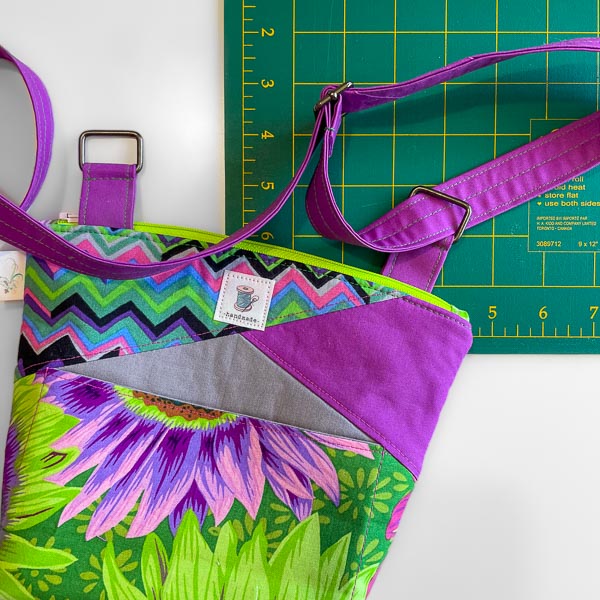
To make sure it isn’t twisted, your strap should sit looking like this:

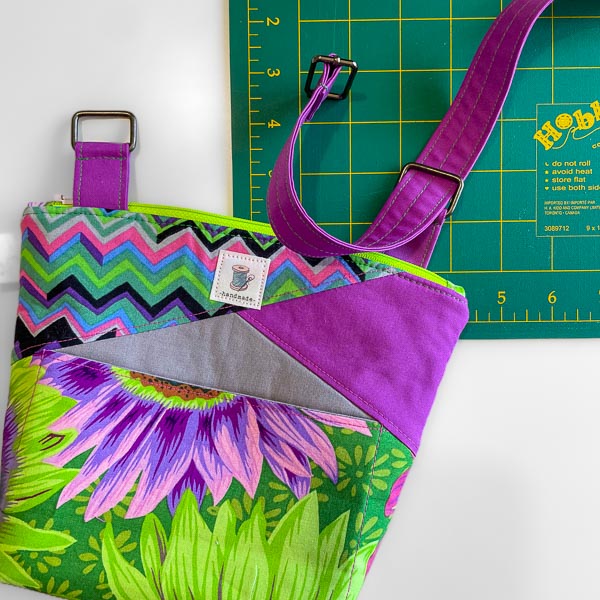
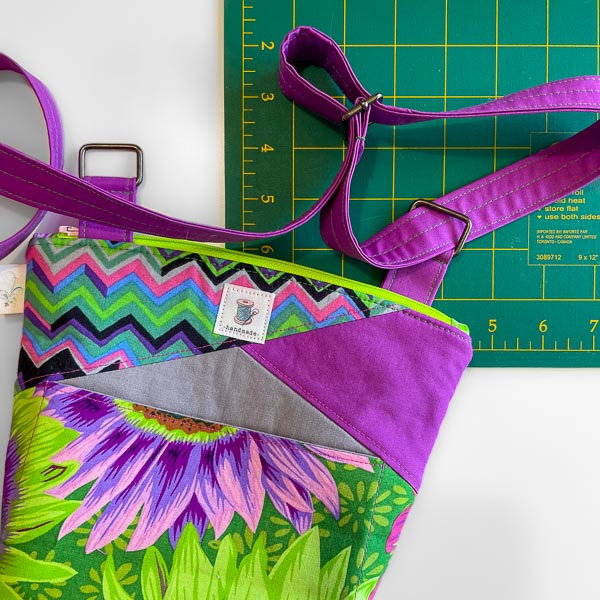
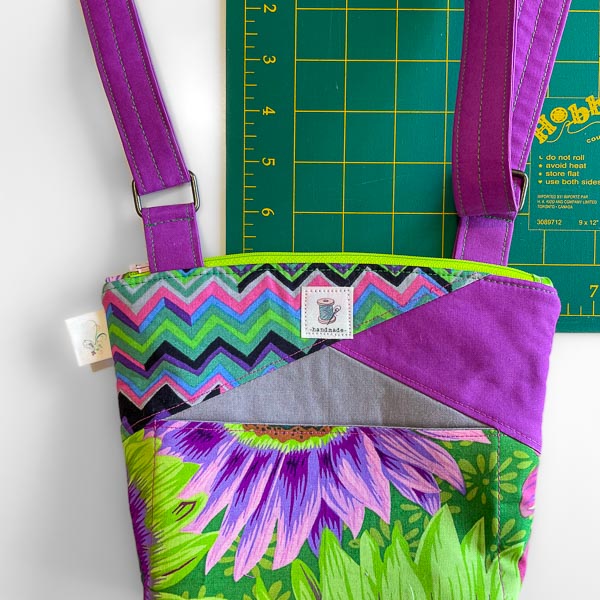
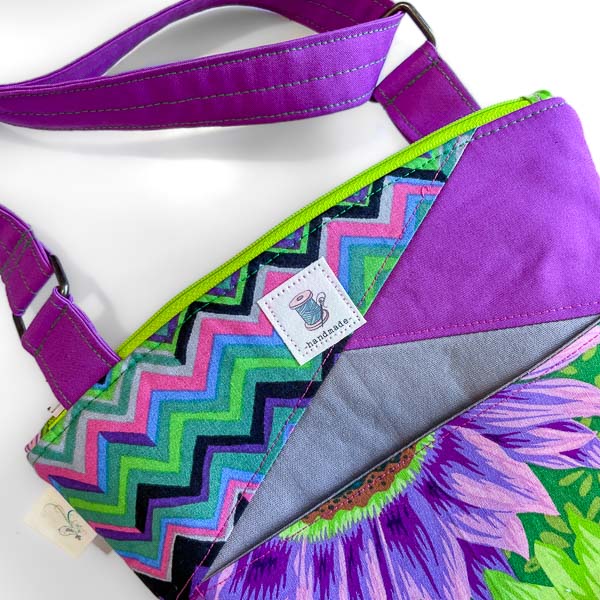
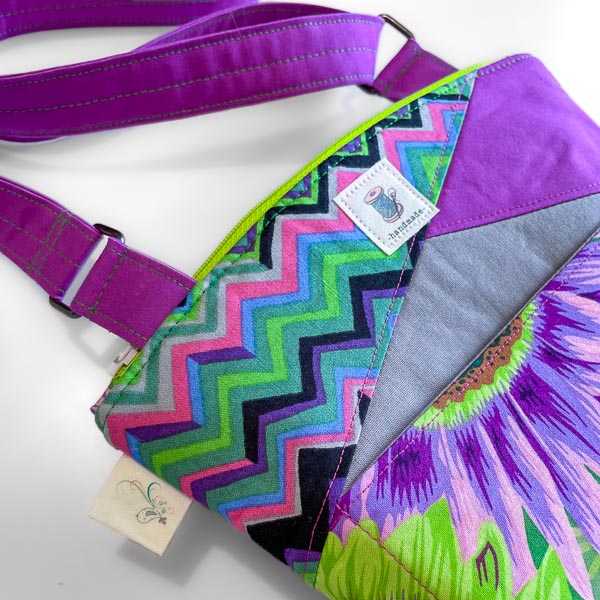
Step back and enjoy your new Stand Up Clutch with an adjustable crossbody strap!

This little clutch is just so much fun as a small crossbody bag!
We hope you found this little tutorial fun! When you make your next Stand Up Clutch with a crossbody strap, make sure to pop over to the Andrie Designs Patterns Facebook Group and share it with us there!
Happy Sewing!
I love your standup crossbody bag and I cannot wait to get started I will send a photo when its done. Thank you very much for your fantastic tutorials and patterns.
Ros from Australia
Thank you so much Ros! We look forward to seeing your beautiful creation! Happy sewing!