Tips & Tricks
Beginner’s Guide to Sewing Your First Bag – Part 3

Hey bag makers! Welcome to Part 3 in the Beginner’s Guide to Sewing Your First Bag series and today we’re going to get sewing! We’re going to talk about how to keep seam allowances accurate, how to attach hardware and all kinds of techniques for sewing various aspects of a bag! So let’s dive right in and get to work.
Week 2 – Cutting into Your Fabric
Week 3 – Sewing and Finishing Your Bag!
Before we get started, remember to keep your pattern instructions at your side as you sew. There will be numerous instances that you will need to reference the pattern; having it close, either printed or digital, will come in handy!
Seam Allowance and Seam Lengths
Sewing bags comes with all sorts of different seam allowances, but we have some tips to make sewing them much easier. Almost all Andrie Designs patterns are sewn with a 1/2″ (1.3cm) seam allowance (unless we mention otherwise). Having this extra space allows for minor errors and more accuracy when sewing. It can, however, feel overwhelming to keep that width accurate. One way to ensure you sew the seam allowance correctly is to draw it on before you start sewing. This works especially well when sewing foam. Foam squishes quite a bit under your presser foot, so having that seam already drawn makes it easier to follow. It’s also helpful to draw on your seam when sewing curves because it can be difficult to keep your seam allowance as you sew along the curve!

Another option is to use seam tape, washi tape or painter’s tape as a guide. Seam tape is already spaced out in ¼” (0.6cm) increments, so it has a double purpose of giving you both a ¼” (0.6cm) and ½” (1.3cm) seam allowance. For seam tape, line up the edge with your needle nearly all the way down and tape it in place. Most machines have the lines on the base plate that you can use for accuracy.

For washi tape and painter’s tape, place a ruler under your presser foot with the needle down at the distance away that you need. Place the tape along the edge of the ruler, and you have the perfect guide!

When it comes to stitch length, you want to take into account the material you are using and your machine. If you are using a manual machine, using a 2 or 3 stitch length is great for all aspects of your bag. You will find going up in length for heavier materials is easier, so practice with some scraps before you sew.
For digital machines or manual machines with sliding lengths, we like to use 2.5mm – 3mm for our standard stitch length and 3.5mm – 4.5mm for the topstitching.

Topstitching Tips
When sewing your topstitching seam allowance, that 1/8” (0.3cm) seam can be tricky at times, but I have a tip that I have shared over and over in sewing classes! Most machines can move your needle to the left. If you move the needle over and use a zigzag stitch foot, you can follow the middle of the foot as a guide for your seam allowance. This may not work for everyone, but it is a trick I use for every single thing I topstitch! Alternatively, you can draw on your seam allowance!


When sewing your topstitching, thread colour is important. For a more professional finish, using a matching or coordinating thread and bobbin colour to your fabric really makes all the difference. Your bobbin thread does NOT have to match your upper thread, so feel free to match each thread to your fabrics.
For a clean finish, try to topstitch from the outside of the bag. You will find that the needle presses into the fabric nicer from the top than the bottom. There may be situations where it can’t be done, but when possible, stitch from the outside! Remember that if you get to any spots that are thicker, use your hump jumper/height compensation tool to get over them and reduce the chance of skipped stitches.


Sewing Straps and Connectors
The first thing we like to get out of the way when sewing bags is sewing all the straps and strap connectors. They are probably the most boring part of sewing a bag, so if you leave it to the end, you will feel like you’re suffering through finishing!
Sewing straps for a bag is much different than sewing straps for clothing. You won’t be making a hollow tube as that’s just not sturdy enough for the wear and tear that bags go through. So, we tend to sew straps a little differently for bags!
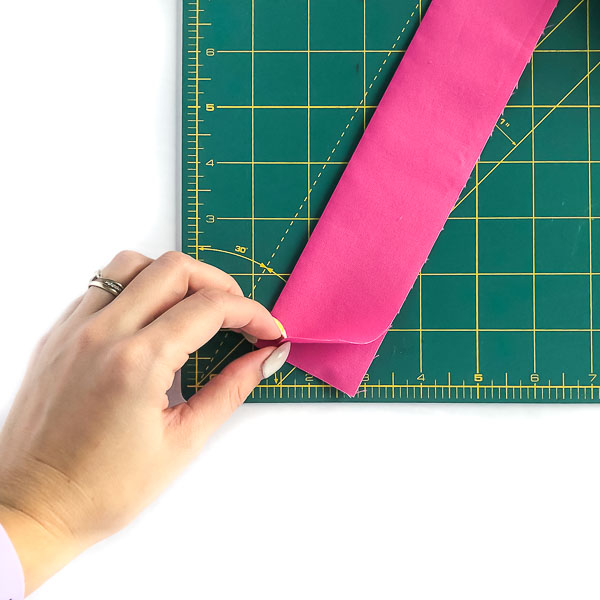
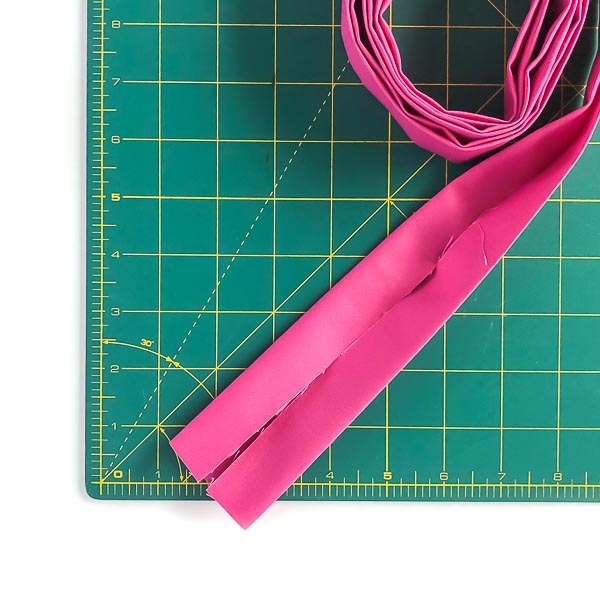
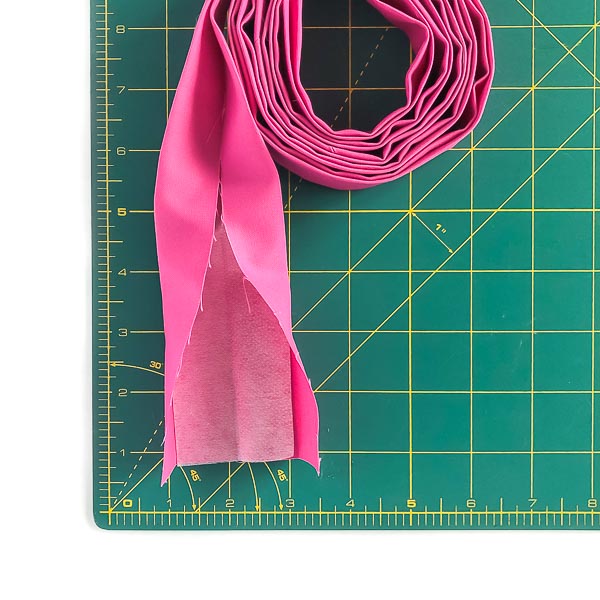
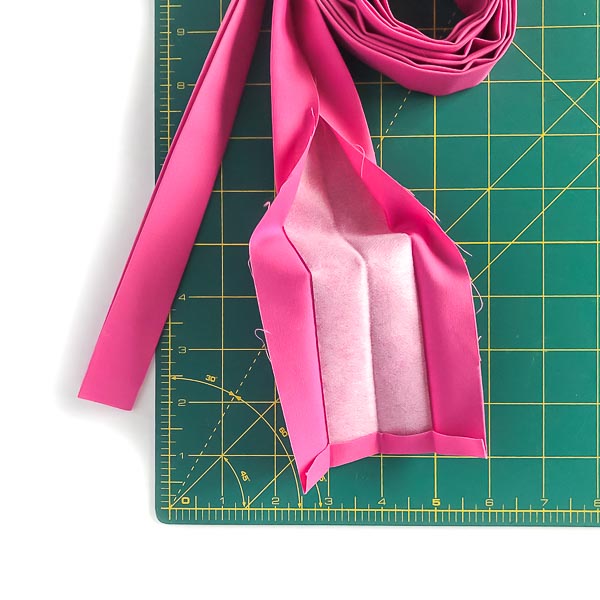
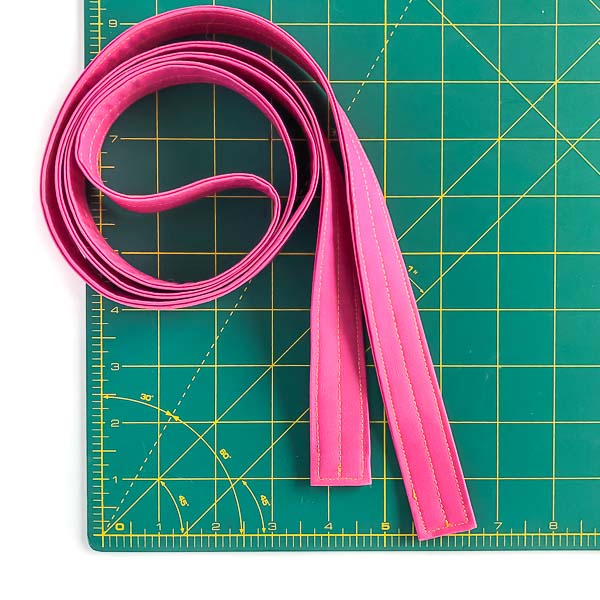
Quite often when sewing strap connectors, your steps will be the same. If you are sewing a bag such as the Classic Market Tote like I am, the strap connector sides are folded into the middle, then the interfacing is fused down the centre. This reduces bulk and gives such a beautiful finish!


Sewing Zippers
Zippers often seem so intimidating, but when it comes to sewing bags, I actually love sewing them! The part of the bag you are installing the zipper in will determine the foot you will use on your sewing machine!
If you are sewing a recessed zipper or a gusset zipper, you will want to use a zipper foot. Not all zipper feet are created equal, though. We prefer to use a narrow zipper foot instead of a wide foot. With the wide foot, it sits ON your zipper teeth as you sew, and I find it often causes you to sew far too close to the zipper teeth, which will cause the zipper to snag when opening. Using the narrow zipper foot instead allows you more control over the seam allowance!

When sewing recessed zippers, gusset zippers or top edge zippers, you want to clip your zipper in place using wonder clips or something similar instead of pins. Oftentimes you will find that if you pin your zipper, you will end up with a wavy or rippled zipper at the end. Using clips allows the zipper to move freely as you sew.
For a full step-by-step guide for sewing all types of zippers, check out the course below on our YouTube channel!
Unlike other zippers in bags, the ones in pockets can’t be pinned in place. For these zippers, you’ll want to use glue or tape to secure them. If you are using tape, try to keep it at the very edge of the zipper tape so that your machine needle avoids sewing into it.


When topstitching a zipper pocket, you can use whichever foot you like. I use my zigzag foot for nearly everything because it has a wide, sturdy base to it, so I don’t have to worry about the discrepancies of heights! I will often use the tip I mentioned in the topstitching section, moving my needle to the left, when topstitching my zipper pockets.


To get an in-depth look at how we sew zippers, check out the videos below. For all patterns since the release of the Round it Up Clutch, make sure to check out the How to Sew a Hidden-Edge Zipper Pocket video, too!
For The Complete Messenger Bag pattern and all patterns before it, see the Beginner Bag Making Basics – Part 2 video!
Attaching Hardware
Did you know that your zipper foot will also come in handy when sewing your bag hardware such as connector rings? If you attach your zipper foot, you can get super close to the hardware as you are sewing the connectors into place.

This works for all hardware from o-rings to rectangular rings, even d-rings too! Check out the video below to see this in action!
If you are sewing the Creatives Tote, you’ll notice that we have little connector covers that add a nice little accent to your bag and cover the bottom of your strap connectors. Make sure to check out the full video tutorial on how to position them and sew them into place below.
If your pattern requires you to install a magnetic snap, follow the steps in this course:
If your pattern requires you to install a turn lock, check out our post Installing a Turn Lock to see 2 different ways to install them!
Sewing Boxed Corners and Easing Gussets
When it comes to sewing boxed corners, you want to be prepared for all that excess bulk at the seam in the middle. This is the perfect opportunity to use your walking foot to help feed the layers through your machine. Gently squeeze the layers to temporarily flatten the seams as you sew. If you find the bulk to be a bit too much, you can hammer right at the middle seams to flatten it a little more.
Quite often when you sew a boxed corner, you can see the stitches, and that can be frustrating! To help reduce the stress on that seam, sew a second line of stitching about an 1/8” (0.3cm) away from the first seam WITHIN the seam allowance. It’s also helpful to use a matching thread so the stitches are even less noticeable!
Below I’ve shared 2 ways that I like to clip and pin my boxed corners in place so they stay accurate as I sew.


If you want to see even more tips, check out the video below!
Sewing a gusset for your first time can be quite frustrating if you don’t know the best way to do it. It’s quite tempting to start at the top and then try to pin around, but what you will find is that you will come up short. Here’s what to do instead!
Mark the centre on both your bag panel and your gusset piece. Clip/pin the top of the bag and the middle in place FIRST. Then clip/pin the straight edges next. Once these spots are in tacked together, you will ease the curves into place last, snipping into the seam allowance as needed. Doing it in this manner changes how the gusset lands and makes installing it much easier! Check out the video below for all the steps!
Trimming Seams
Okay, now that you’ve mastered sewing seams, let’s chat about trimming them! With Andrie Designs patterns, we use a 1/2” (1.3cm) seam allowance, so you will frequently have to trim your seams. If you follow these tips, you’ll be trimming seams beautifully!
If you are trimming a straight seam, you can use your rotary cutter with a ruler to get a nice clean seam or use your scissors. If you have had to baste your foam to your panels, you have the perfect stitch guide for cutting.


If you are trimming a curve, you can use your scissors or pinking shears. I even have a zigzag rotary cutter blade to make life even easier!

Quite often you will need to trim your foam and fleece out of your seam allowance. The easiest way to do this is to trim the seam first. Once that is done, you’ll trim the fleece or foam. If you used a fusible stabiliser, you’ll gently peel it away from your fabric and then trim.
If your seams are too thick before topstitching, follow the tips in this video for reducing that bulk!
Turning Out Your Bag
When it comes to that final moment when you turn your bag right side out through the zipper pocket or open seam, it can be so scary to squish up your bag. I promise you that you will not hurt it. I have been brutally rough with bags before when turning, and they always turn out fine. The first thing you will do is squish that entire exterior through your pocket or open seam. Tuck in your pocket/open seam and stitch closed, then tuck in your lining. Last, you will roll down the top hem to finger press it smooth and flap. At this point, you can press that seam smooth or you can do as I do and pin it smooth!


Final Pressing
Now your bag is done, and it’s time to get the last of those wrinkles out! The first spot that I like to press is the flat panels.


Next, I like to press the gussets or boxed corners. For boxed corners, fold out your corners like you did when sewing them. Press along that seam fold, using steam if you want to flatten it.


Then take the front of the bag. Fold from corner to corner, getting it as straight as you can. Press along that fold with the edge of your iron, making sure you don’t stay in one spot for long.

For gussets, set the bag on the gusset and fold onto the main panels similar to folding a boxed corner. Press with the edge of your iron along the fold you’ve made. Don’t leave the iron in one spot for long so you don’t leave iron marks.
Lastly, I like to repress my straps in case they got wrinkly when turning the bag right side out!
And there you have it, you made your first bag! Stuff it with a couple of towels or scarves to help it hold it’s shape and take some pretty pictures to share with everyone!


We’ve come to the end of your Beginner’s Guide to Making your First Bag, and we can’t wait to hear what you think. Leave a comment below letting us know which tips helped you the most!
Once your bag is done, pop into the Andrie Designs Facebook Group and share your make with us!
Happy sewing!
-Aimee